How To: Safely Remove & Replace the Charging Port Cover on Your Samsung Galaxy S5
Having a dust- and water-resistant phone is truly useful, but it comes with a price. In order to achieve this functionality, Samsung had to literally plug up any holes in the Galaxy S5, and this included the charging port.The small cover that keeps dust and water at bay, and protects your S5's charging port, can be a bit of a hassle to remove—especially if you bite your fingernails or keep them short. And since the S5 doesn't come with wireless charging out of the box, you have to go through this tired song and dance every single day.But if you value usability more than IP67 dust- and water-resistant certification, you might think about removing this cover. And if you follow this guide, you can always put it back on and perfectly restore your phone to factory condition if you change your mind—or, if you ever need to send it in for repairs, sell it, or plan a weekend at the lake. Please enable JavaScript to watch this video.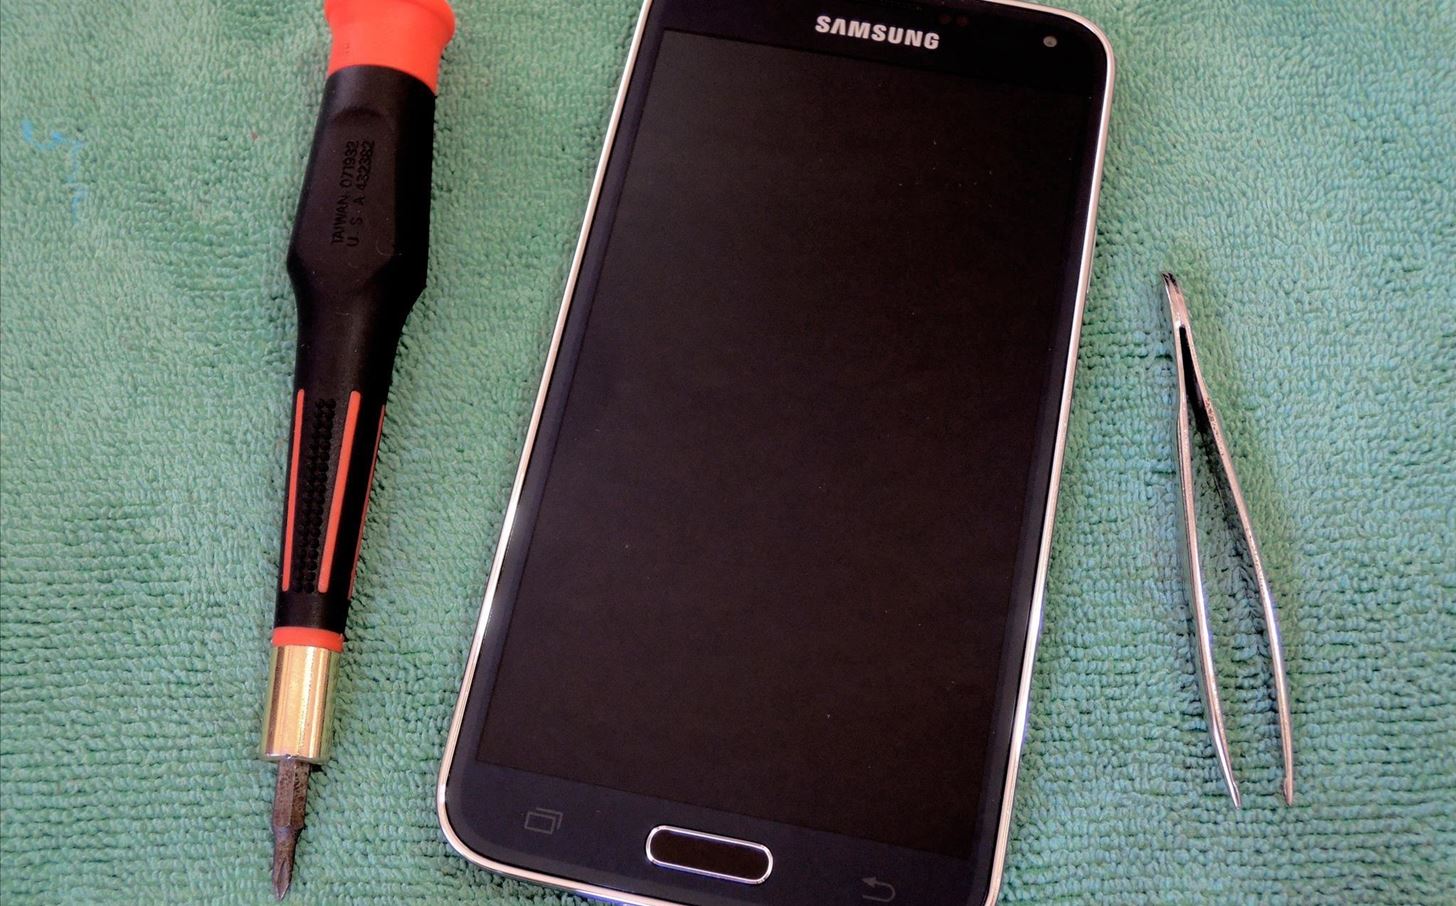
The Materials NeededThis is a really simple hardware modification that involves removing one tiny screw. As such, you'll need a small Phillips screwdriver, preferably size #000. To pull out the tiny screw and pry up the cover that holds your charging door in place, you'll need a set of tweezers or small needle-nose pliers.It would also be a good idea to get a soft cloth to use as a working surface, or an anti-static mat, as your phone will be lying face down on its screen throughout this process.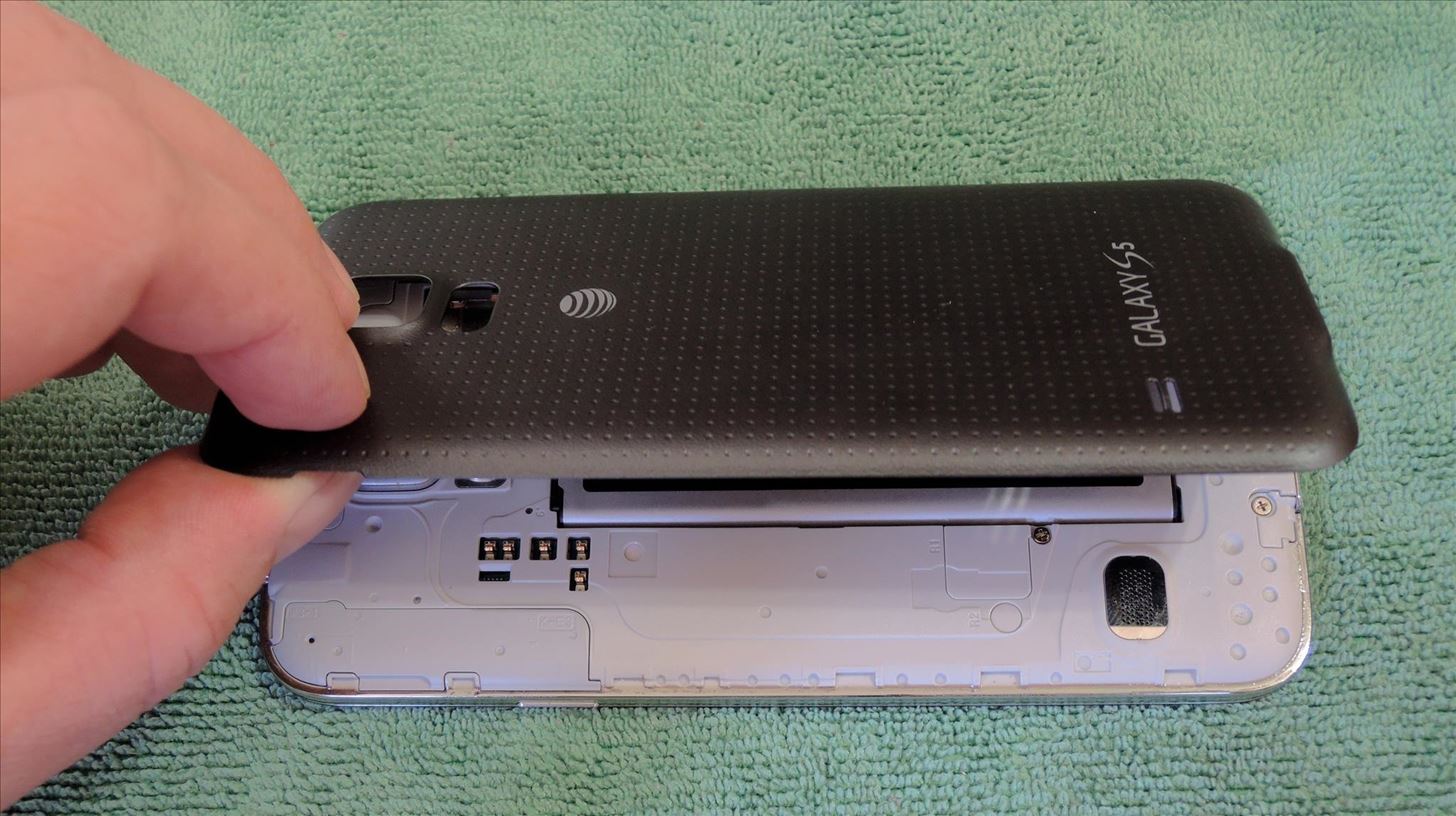
Step 1: Remove the Battery CoverBefore we begin, I'd just like to reiterate the fact that this modification will cause you to lose all dust- and water-resistance on your phone. Don't proceed unless you're okay with the associated risk.To gain access to the screw that needs to be removed, you'll need to remove your battery cover. Lay your phone face down on the cloth to start the procedure. At this point, it's a good idea to open the charging port cover so that you can see where it connects to the phone. The screw that you'll be removing is located right above where the charging cover connects to the phone.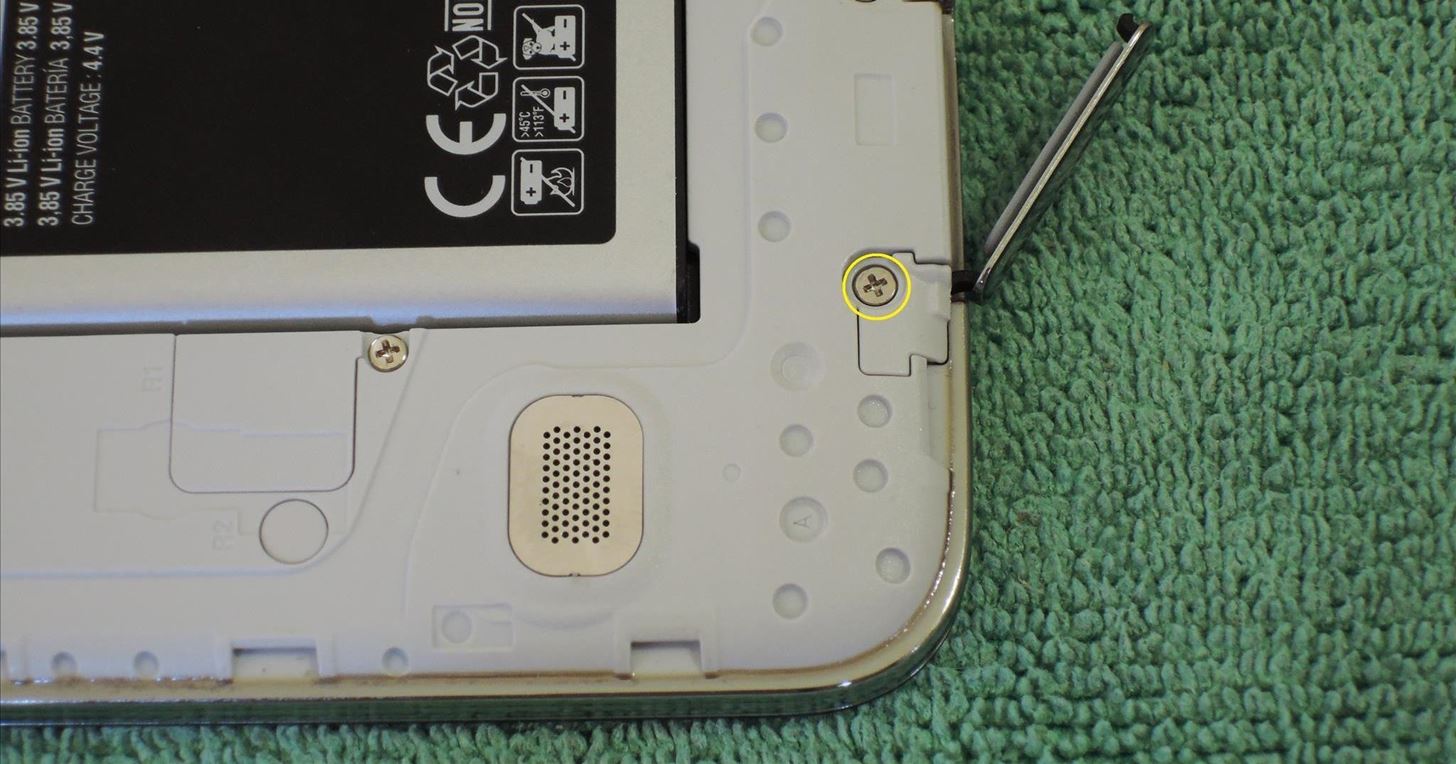
Step 2: Be Certain That Your Screwdriver FitsYou don't want to strip this screw out, so you'll need to make sure that your screwdriver is the right size before proceeding. Again, this should be size #000. If you don't know what size screwdriver you're using, proceed with caution and first locate the screw in question: Gently place the head of your screwdriver into the screw. With the slightest bit of fingertip pressure, get a feel for the fit of your screwdriver. If it locks firmly into place against the tiny amount of rotational force that you're applying, it's safe to proceed. Otherwise, if you feel any slippage at all, find a screwdriver that fits better, or make sure it's a #000 sized one.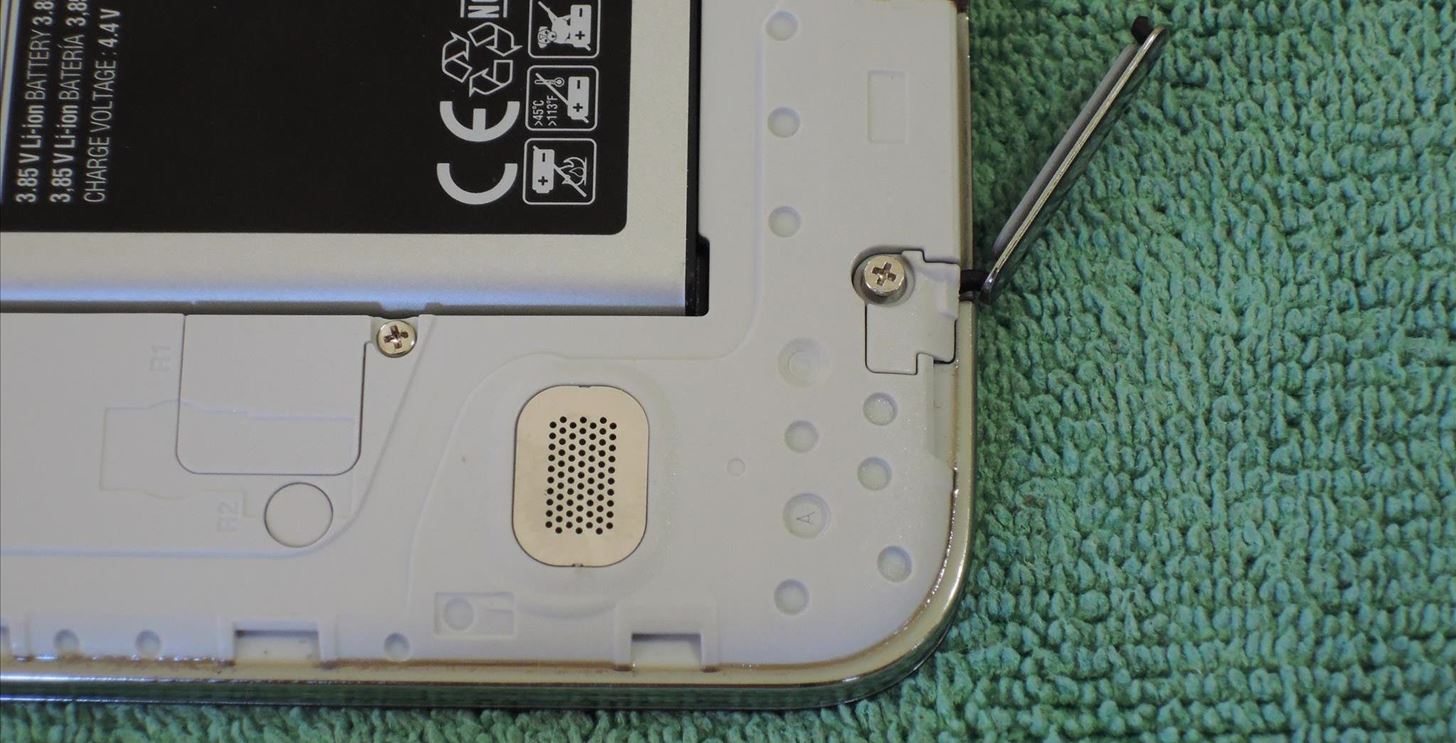
Step 3: Remove the ScrewNow that you're absolutely sure that your screwdriver fits this screw, press down gently against the butt of the screwdriver and proceed to remove the screw. The screw is very small and hard to handle. This is where your tweezers come into play. Use them to remove the screw from its hole, then set it aside somewhere safe. I'd recommend placing the screw on top of the speaker, as its magnetism will hold the screw in place so it doesn't get lost.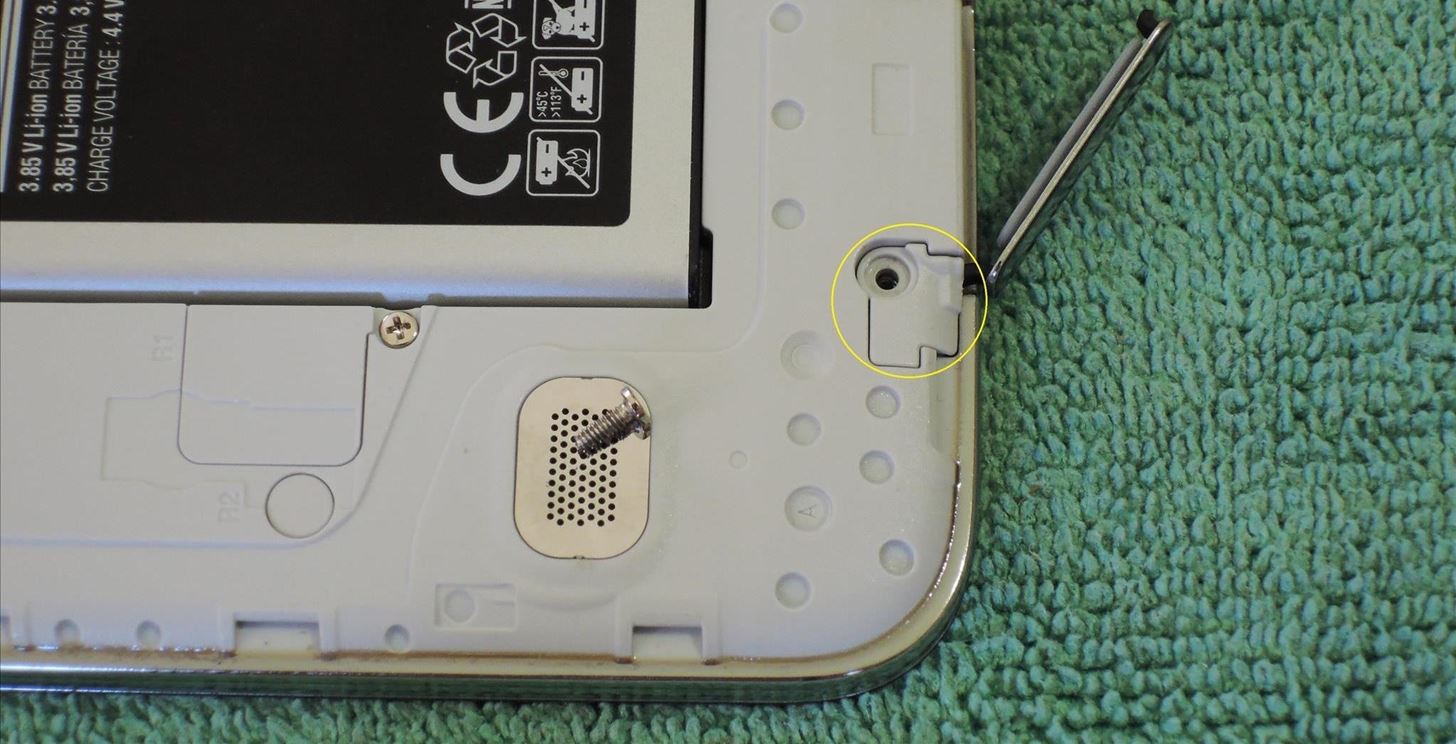
Step 4: Remove the Small Plastic CoverThe screw you just removed held a small, square-ish piece of plastic down. To safely remove your charging port cover, you'll need to remove this piece of plastic. Use your tweezers to gently pry up on this piece. Try not to use the faux-chrome rim as a fulcrum here, as it is easily scratched. Instead, use the small space where the charging door connects to the phone as a prying point. When it's removed, set the piece aside some where it won't get lost.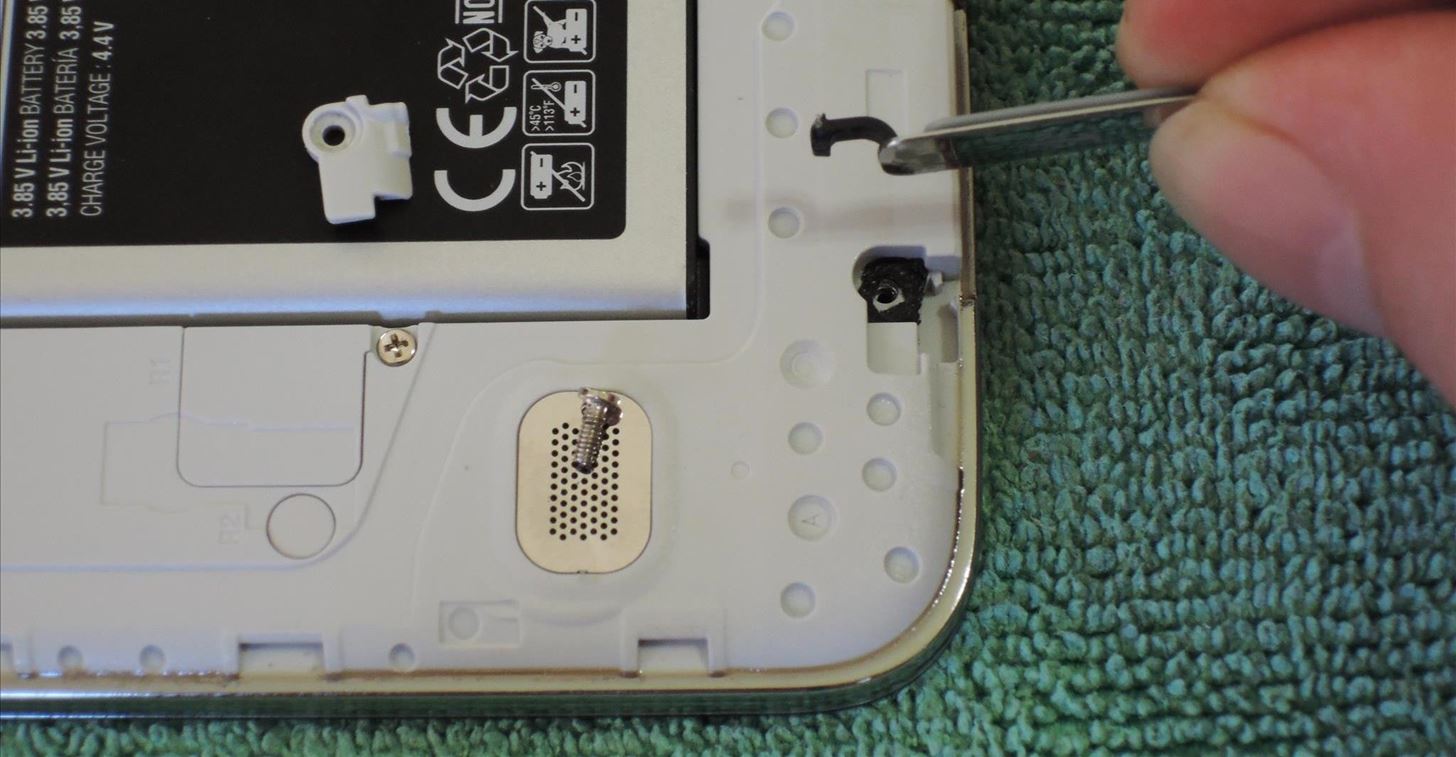
Step 5: Remove the Charging Port CoverAt this point, you're free to lift the charging port cover out of its place. You can see that a small nub at the end of the rubber connector holds this piece into a channel on the phone. Just lift straight up to pull it out.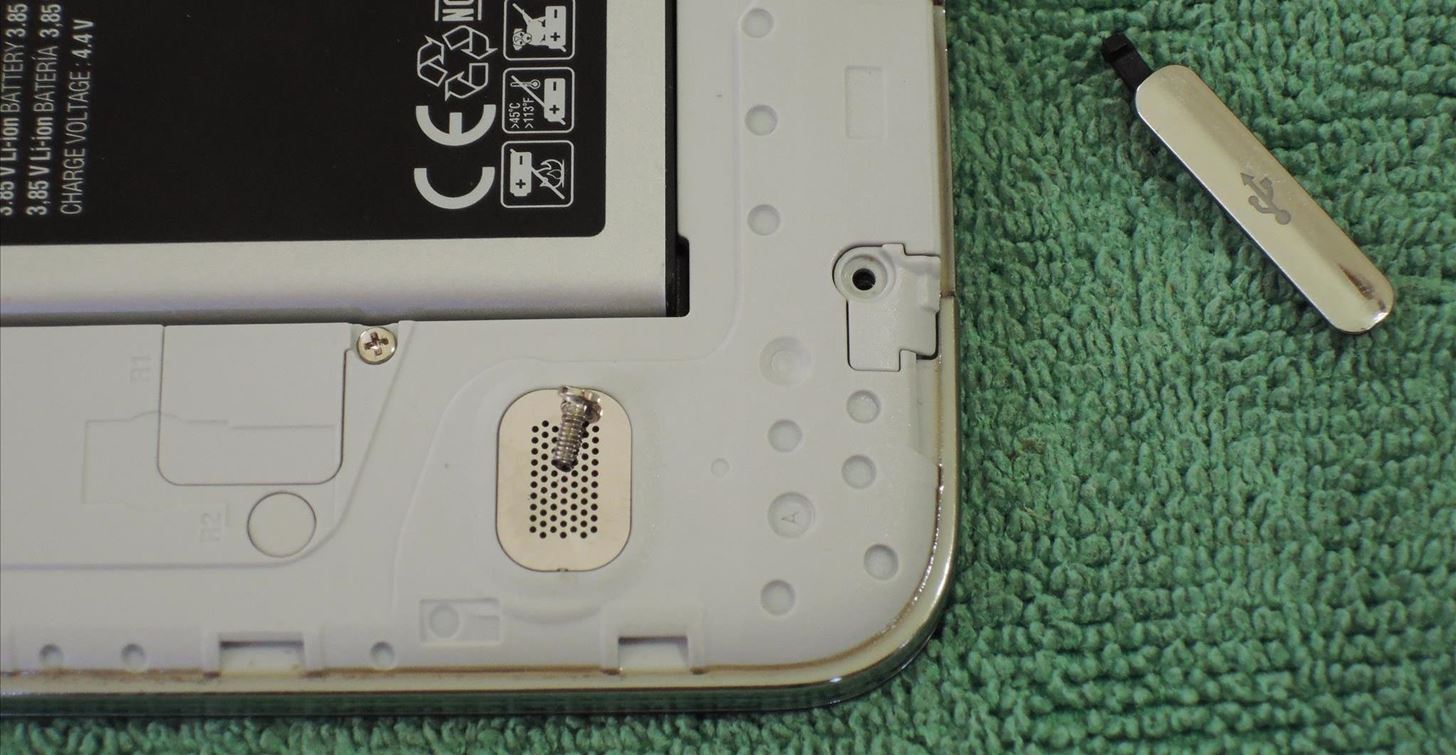
Step 6: Replace the Plastic Cover and ScrewTo secure everything in its place, start by putting the small plastic cover back where it belongs. Next, since the screw is so difficult to handle, just use your tweezers to pick it up by its head. Gently guide the screw back down to its hole, applying virtually no pressure and letting gravity do most of the work for you. The screw should fall back into place with relative ease. Now it's safe to fasten the screw back into place. Be very gentle when screwing it back in, as it's a metal fastener going into a plastic port. When the screw gives any resistance, give the driver an additional 1/8th of a rotation. Essentially, just snug the screw up.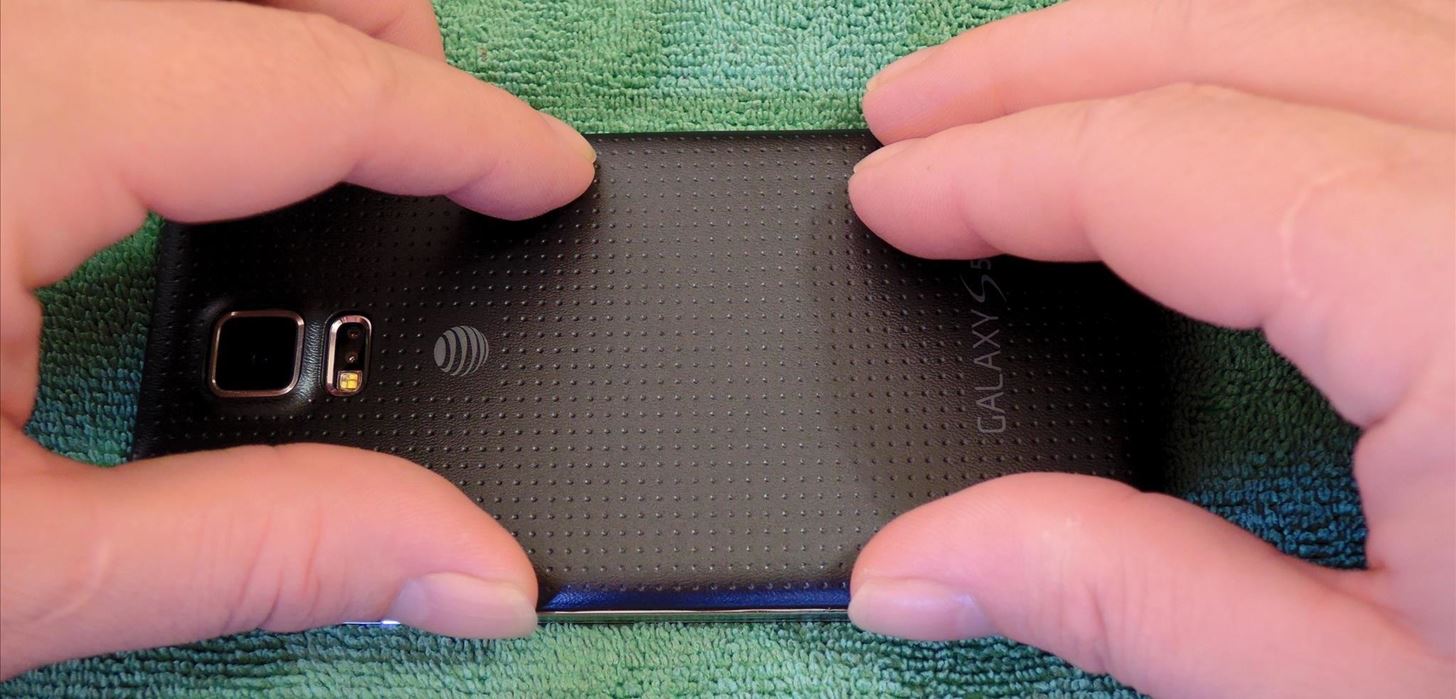
Step 7: Replace the Back CoverAt this point, you're pretty much done. Just snap the back cover into place and you can go about using your phone as normal. It would be a good idea to store the charging port cover in the box that your Galaxy S5 came with. If you ever intend on selling the phone or sending it in for warranty purposes, you'll need to put the cover back on. And that's it, really. You no longer have to struggle with that bothersome charging port door every night. I'm loving how easy it is to plug in my charger, how about you? Let us know in the comments section below.
If changing the look and feel of your lock screen isn't your primary goal, and you'd like to be more practical, you should check out IntelliscreenX ($10). Although iOS 5 is capable of providing a
Earlier this month, Adam Cudworth, 19, launched a camera attached to a weather balloon into the edge of space. Battling tough winds, freezing temperatures, atmospheric pressure and tumbling speeds, the teenager from Worcestershire, England was able to capture these amazing pictures of the Earth's upper stratosphere.
Explore 10 incredible open-world games | PCWorld
In this tutorial, I'll be showing you how to get widget toggles on your home screen or in your notification tray that are capable of performing almost any system function.
How to Use Quick Actions to Toggle Settings Easily in Windows
Other players >>> Playing music from your PC at home will work, however, if you want to stream music from your collection while on the road using a phone, it no longer works because of the Sonos app(s) requiring a Groove Music Pass subscription to access/connect to your cloud library on Onedrive.
12 Awesome Android Apps for Plugging in to the Cloud
Insta Slang Explained: What's the Meaning of Finsta
How to Enable Intelligent Scan. When you first set up your Galaxy S9, you'll be prompted to setup Intelligent Scan automatically. Just follow the prompts to scan your face and irises and enter a backup PIN, password, or pattern when asked.
3 Ways to Unlock Samsung: SIM Network Unlock Pin- dr.fone
Well, we bring you 8 Windows 10 tricks, secret features and hidden features not many know about. These Windows 10 Hidden features might be limited to the Anniversary Update or Creators Update.
16 Hidden Apple TV Features You Should Know | PCMag.com
Dad wants political turncoats punished the ruling of the lower courts convicting a woman for selling illegal drugs Cebu News. 14 hours ago. Papal Nuncio tells youth: Don't be slaves of
Explore A.J. Cornerstanding's board "Hover bikes", followed by 2093 people on Pinterest. See more ideas about Hover bike, Flying car and Futuristic vehicles.
The 130 MPH Dining Room Table « Car Mods :: WonderHowTo
If you have ever wanted to mod your Android device, your new best friend is easily going to be Team Win's TWRP custom recovery. This gives you access to file flashing on the fly, which can include such things as Magisk for root access, or even a custom ROM to replace the stock firmware that came with the device.
How to Install TWRP Recovery on Your OnePlus 6T « OnePlus
How to recover your admin password for Joomla (cPanel) Reset Joomla Super Administrator Password - Duration: Akeeba Backup 3/3 How to Restore your Joomla site with Akeeba Kickstart
FAQ: How do I recover my admin password? - Joomla! Forum
0 comments:
Post a Comment