How To: Add, Customize & Animate Text Layers in Your Videos with Enlight Videoleap for iPhone
Typography is an important aspect of the video editing process. You deal with it when adding captions to news clips, giving on-screen recipes in food videos, creating burned-in subtitles for short films, making no-sound-needed videos for social media, and so much more. Enlight Videoleap for iOS makes this all easy.If you're going to use Enlight Videoleap to add text to your videos on your iPhone, it's important to do it not only correctly, but also at a high level, to better convey your message and engage your audience. Videoleap's text tools include adjustments for fonts, animations, effects, colors, spacing, alignment, and a lot more.We'll cover each tool one by one and give you the basics to how to make your text live on the screen like it's meant to be there. But first, make sure you've updated "Enleap Videoleap Video Editor" so you've got all the new tools and features.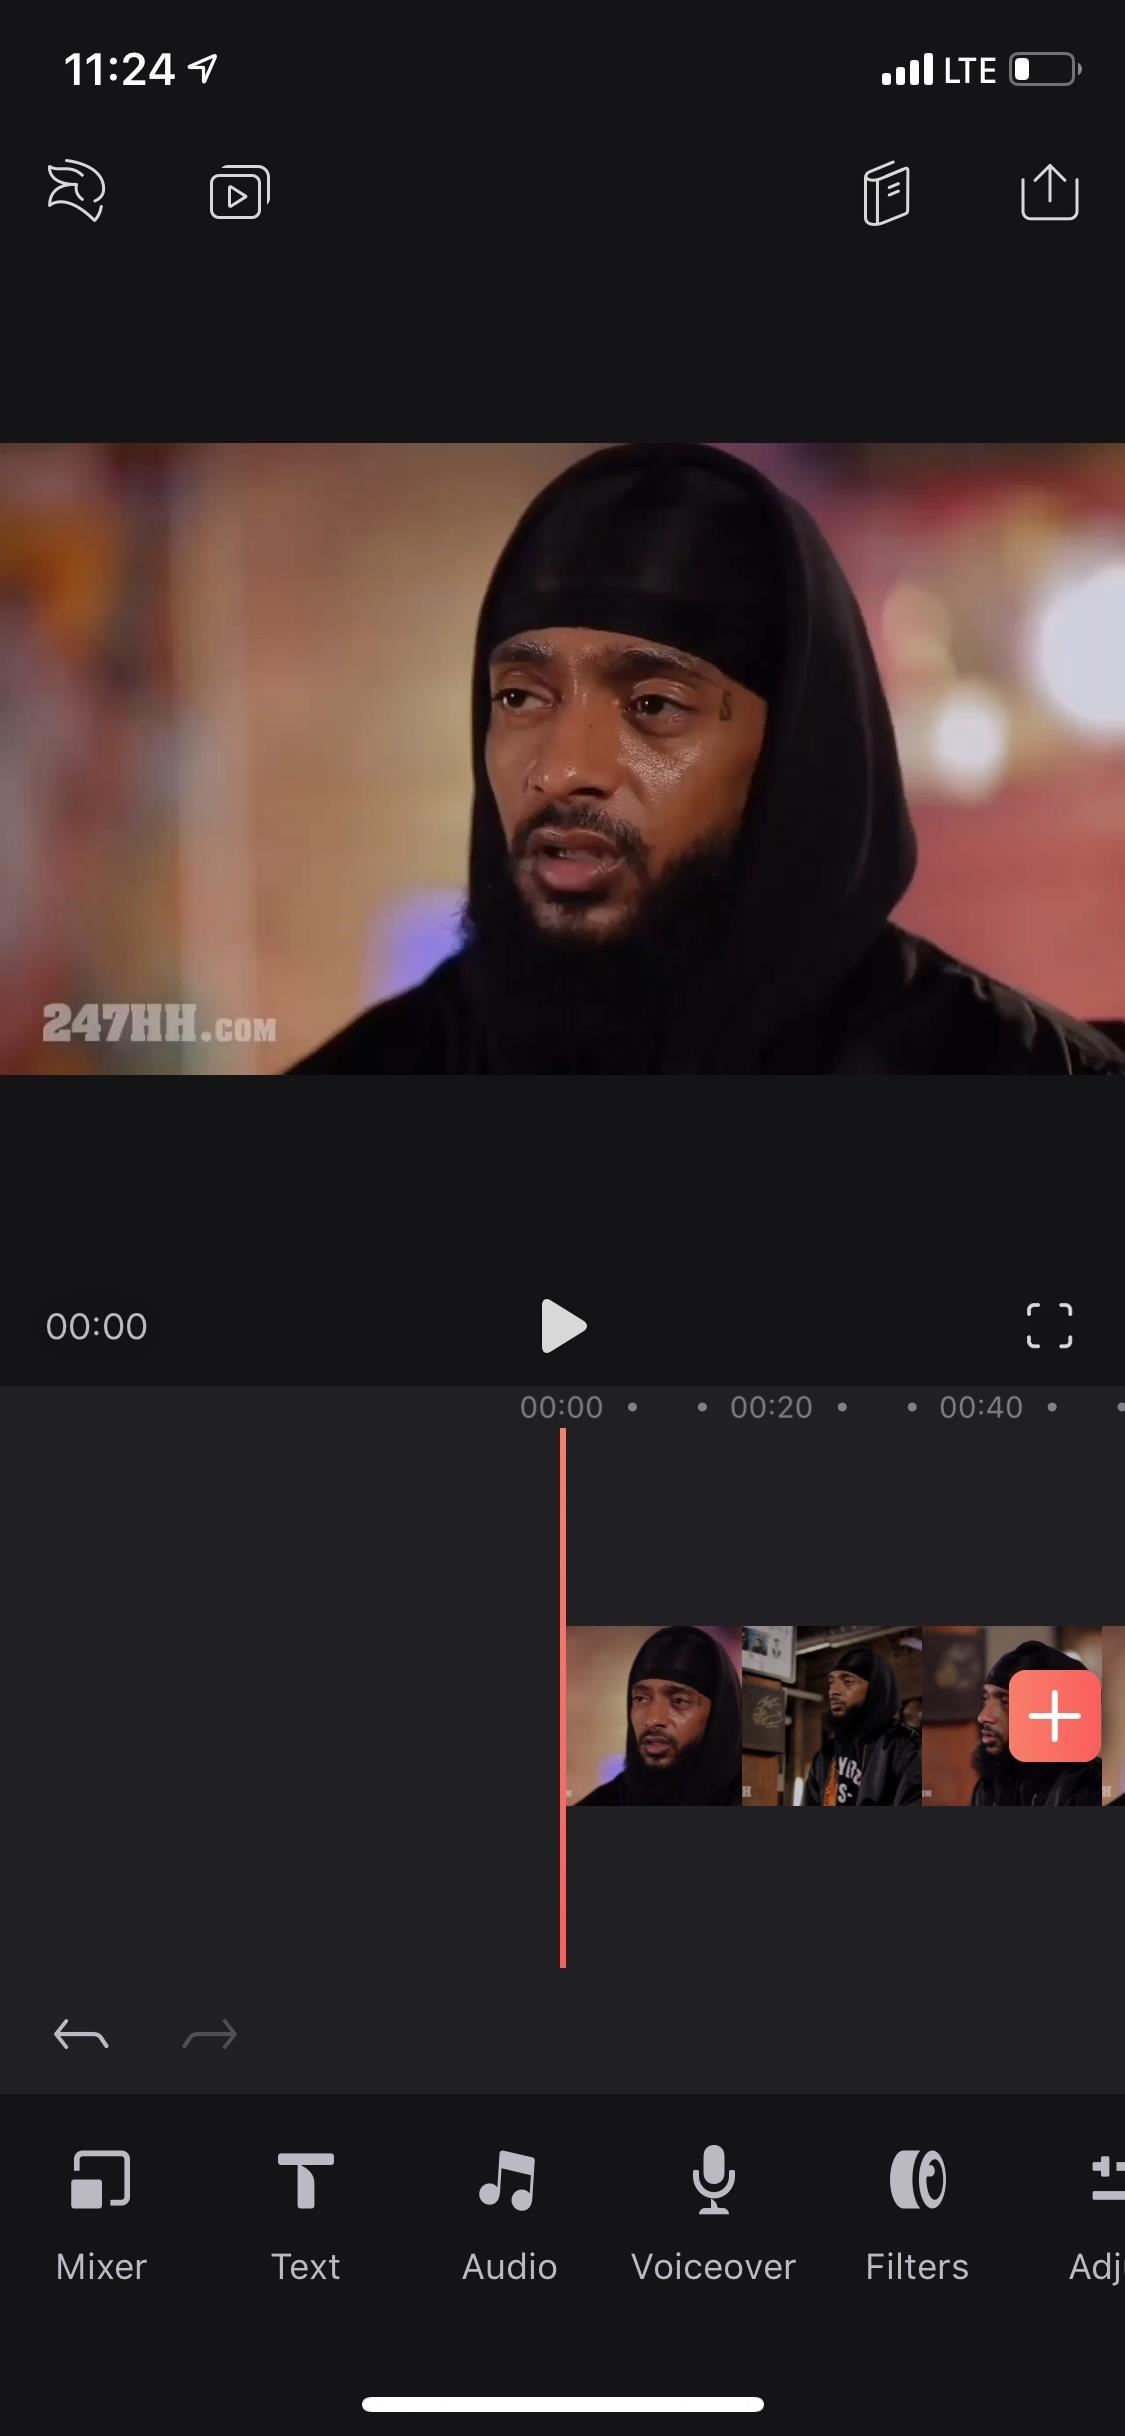
Step 1: Overlay the Text on Your VideoI'll assume you already have a video project loaded into your Videoleap timeline that you text overlayed on. However, you can also start a blank project without any video, which is useful if you want to create a title card with a simple black background, but we'll be using actual video as an example throughout this guide.Without any video clips highlighted, move the playhead to where you want the text to start (you can always change this later, of course), then tap on "Text" button in the toolbar. This will add a new layer on top of any video below it (or empty area, if you want a black background), and a text box will appear in the preview.To add text, do what it says and double-tap in the box to bring up your keyboard. Type in whatever it is that you need or want to appear overlayed on the video. Use the return key to create a line break if needed. Tap on the check mark or anywhere outside of the text box to save the text.Now, you can position the text to where it looks best. Tap-and-hold on the text box, then drag it to where you want it. To angle the text, turn it sideways, or make it upside-down, place one finger near the outside of the box and another finger opposite it on the other side, then turn your fingers until it's situated like you want. To make increase or decrease the size, pinch out or pinch in, respectively.
Step 2: Customize the Overlayed TextThere are over a dozen tools that you can use to customize the look and feel of the text in your videos. We'll go through each one below so you see how they work. To find these tools, just make sure the text layer is highlighted (the layer will have a white border the text box a red border).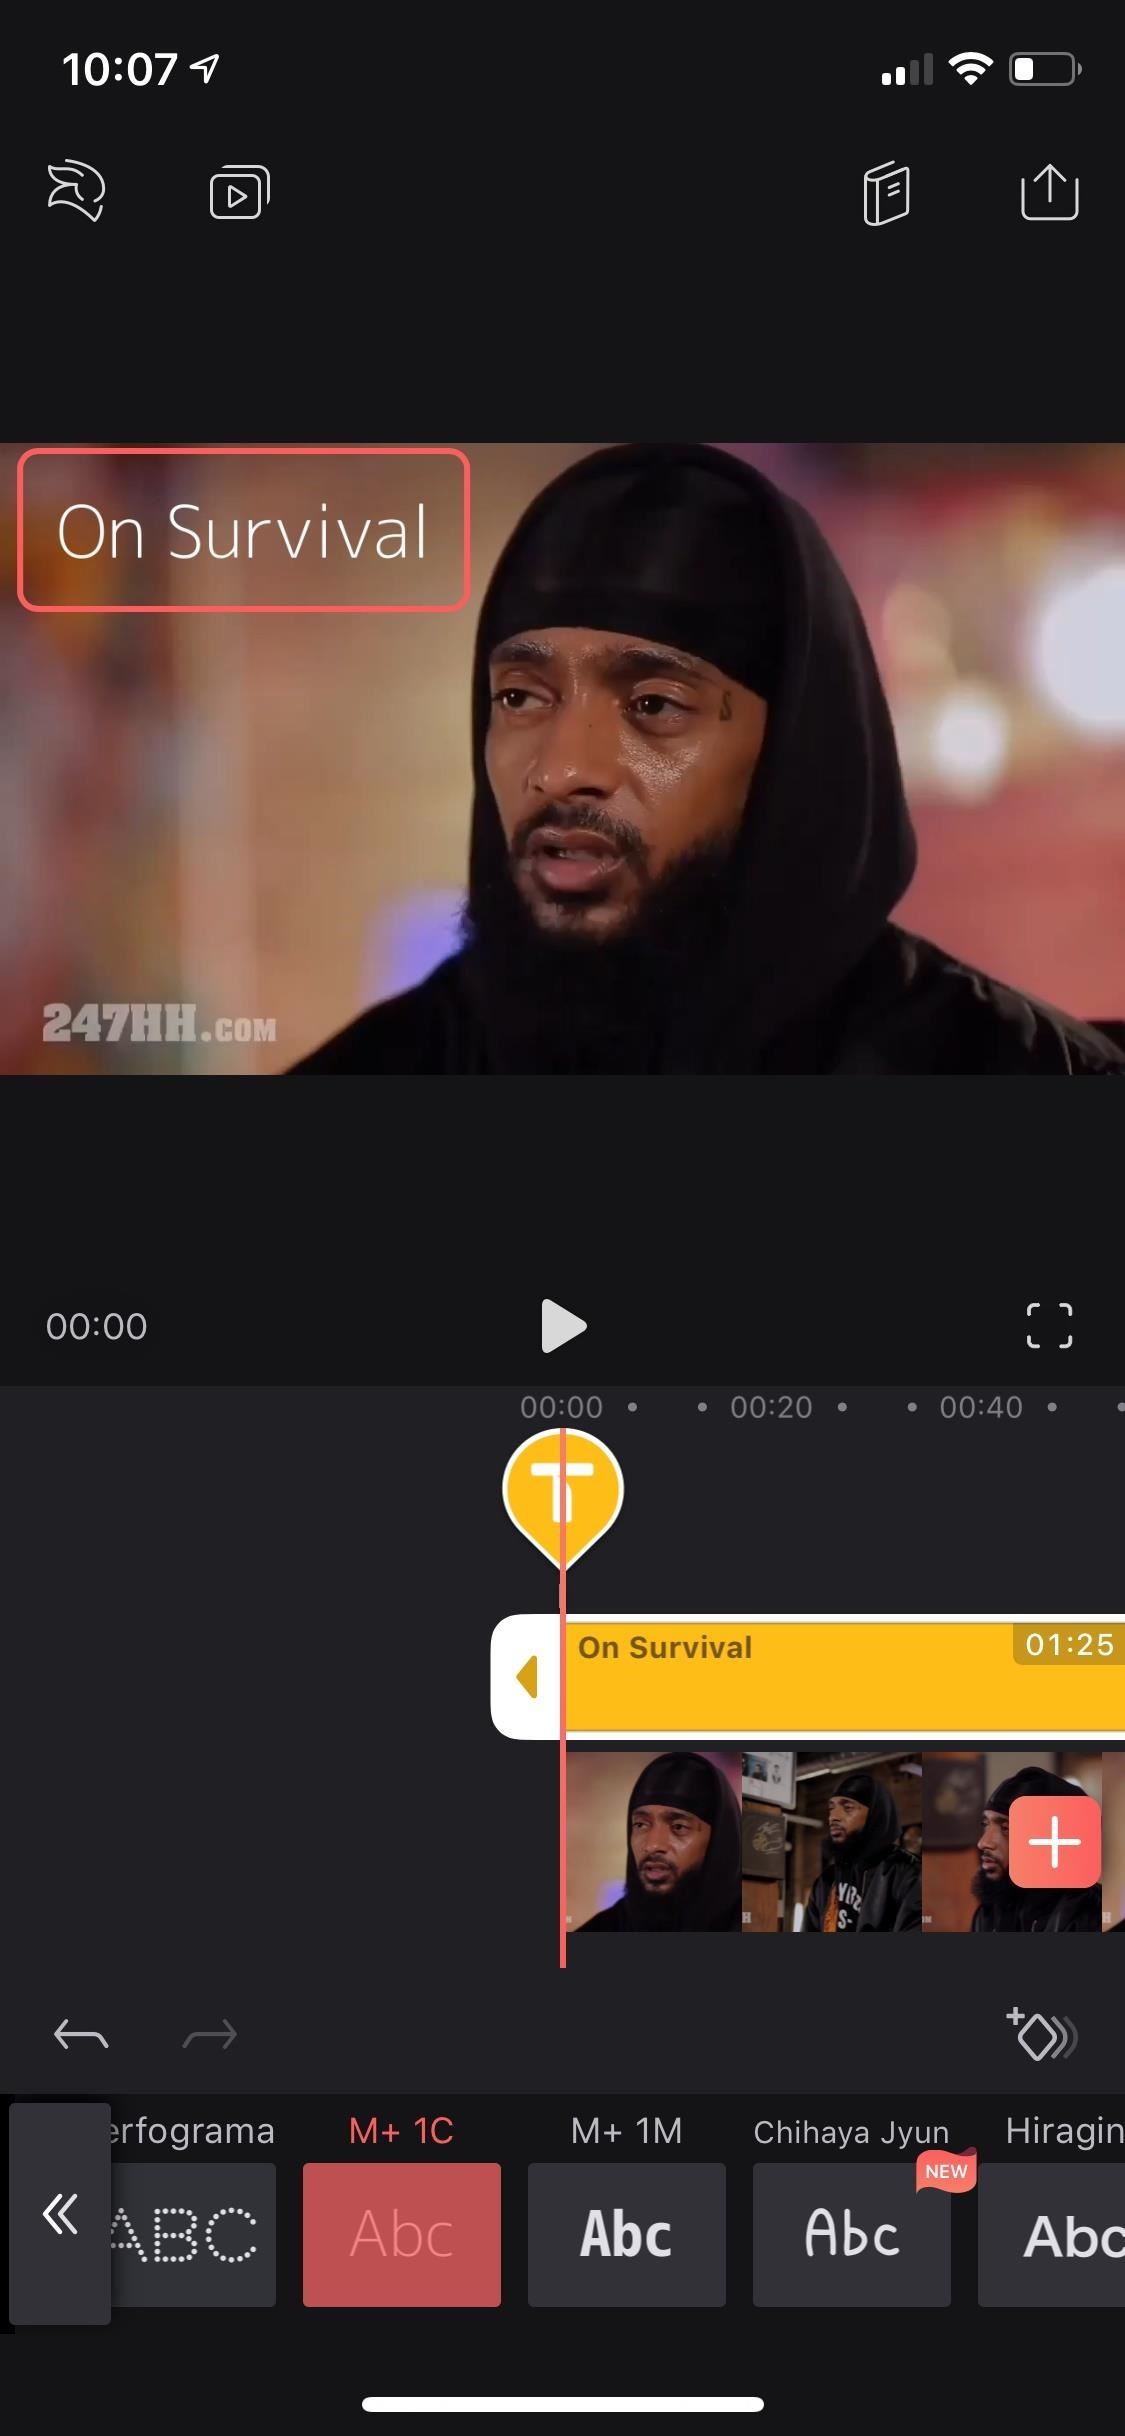
1. Change Your Text's Font StyleThe first item in the text toolbar is "Font," a recent addition to Videoleap, which includes over 35 different styles such as Open Sans, Script, and Gothic. Each font has different spacing and sizes, so you'll have to change the size and position of the text box as described in Step 1 to have it fit on the screen where you want.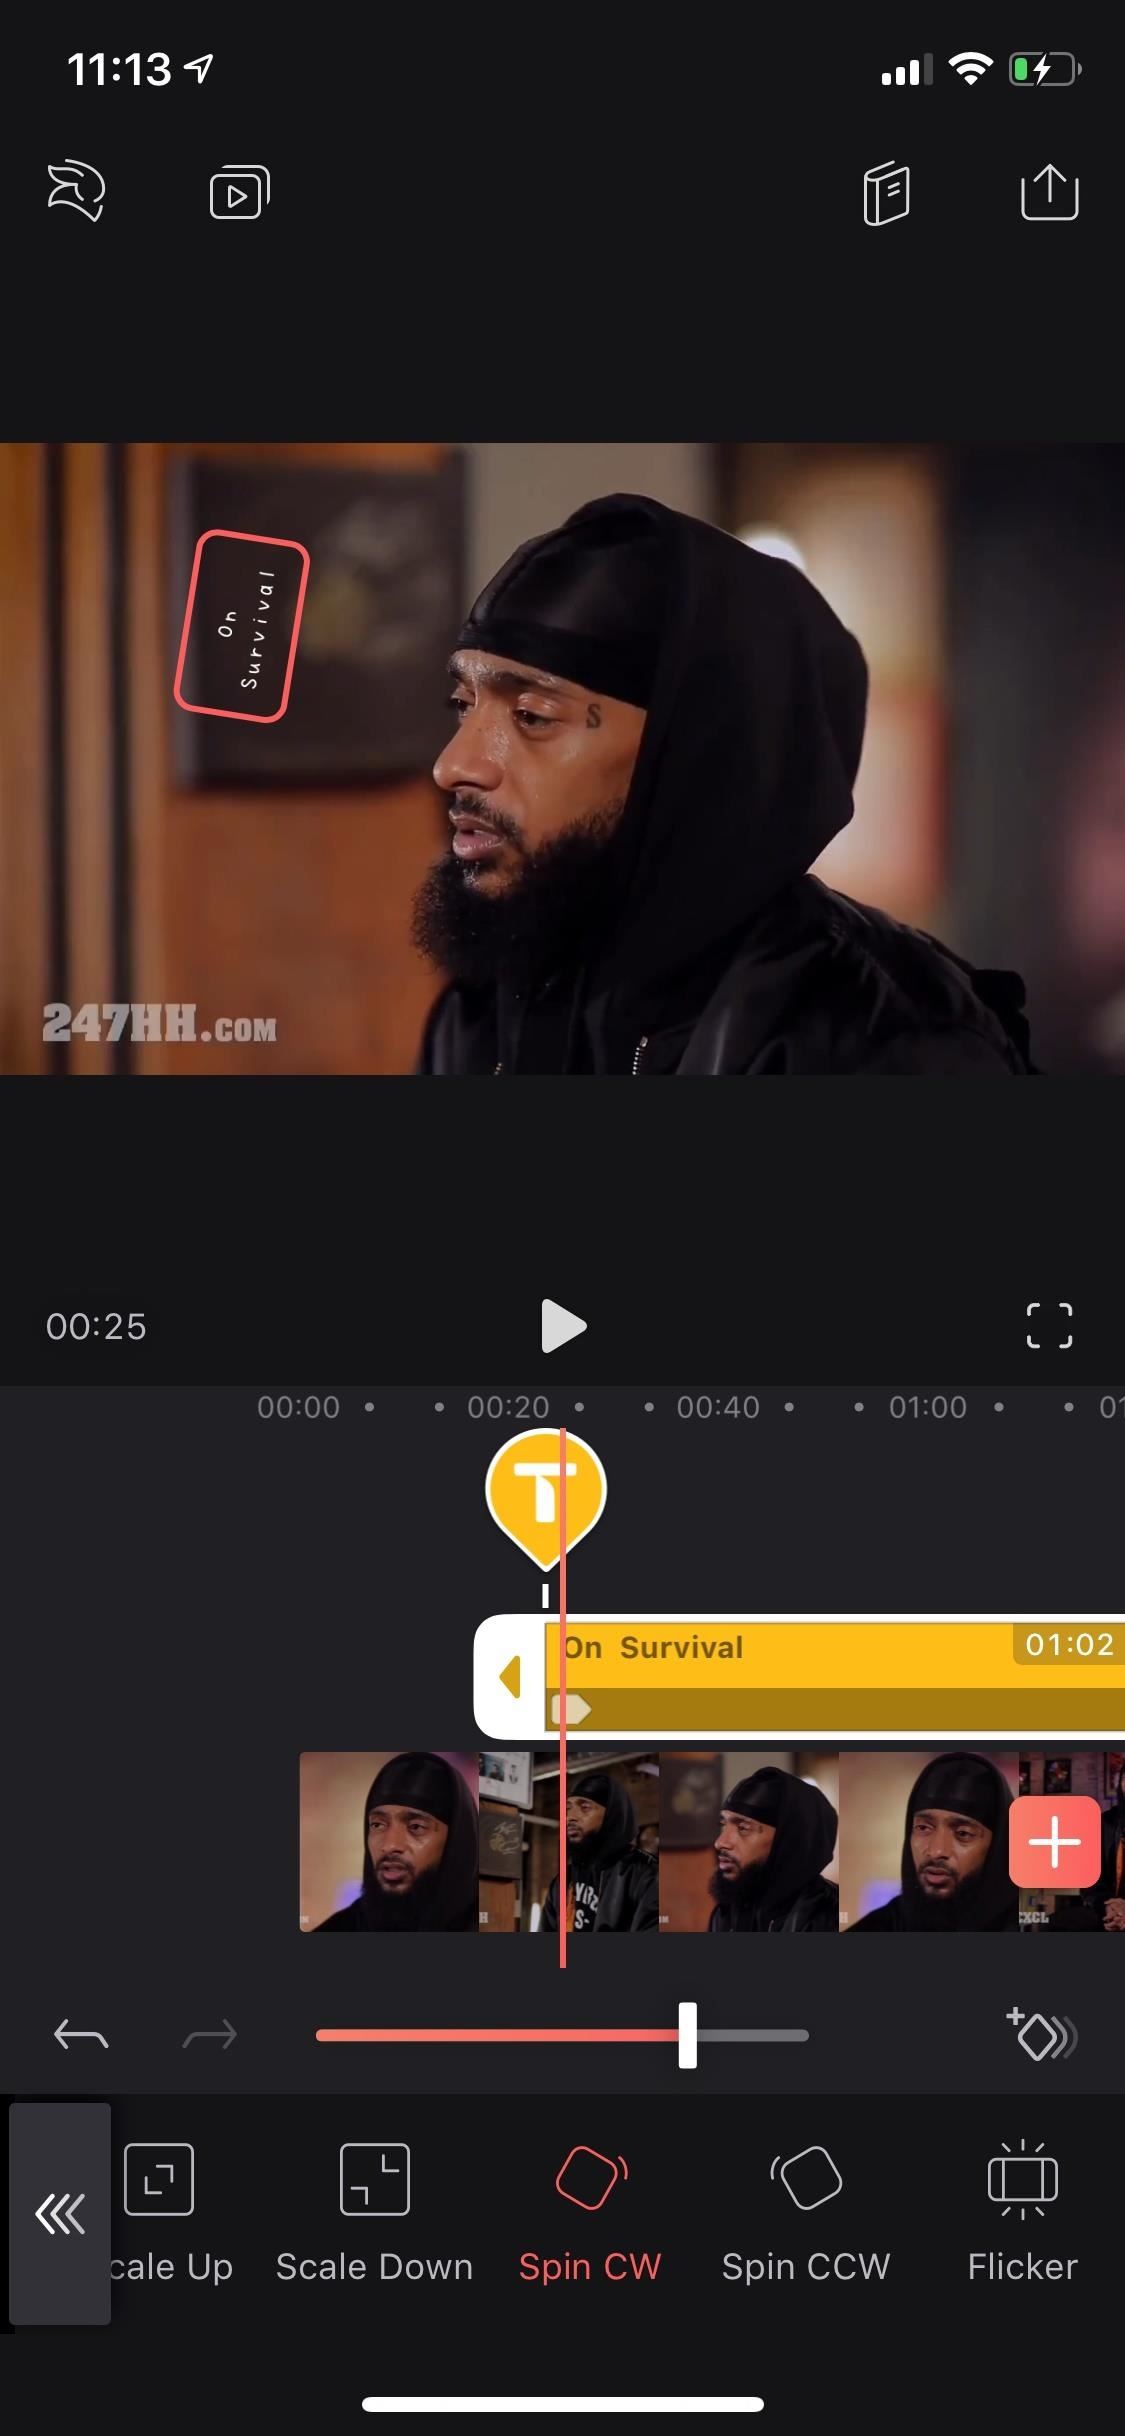
2. Add Transitions & AnimationsThe next tool is "Animation," which is a bit more extensive than the rest. With it, you can add a beginning transition or ending transition, as well as an animated effect to the whole entire text layer. Tap on "Animation," select "In," "Overall," or "Out" to choose where you want the animation to appear. And it's not an either-or situation, you can choose effects from all three if you want.The same animated transitions appear for "In" and "Out," including fade in or out; slide up, down, right, or left; scale up or down; spin clockwise or counterclockwise; and flicker. For the "Overall" animation, you can choose from a blinking, pulsing, floating, spinning, or wiggling effects. Once you select one, slide the marker beneath the video to either change its length (for transitions) or speed (for overall effects).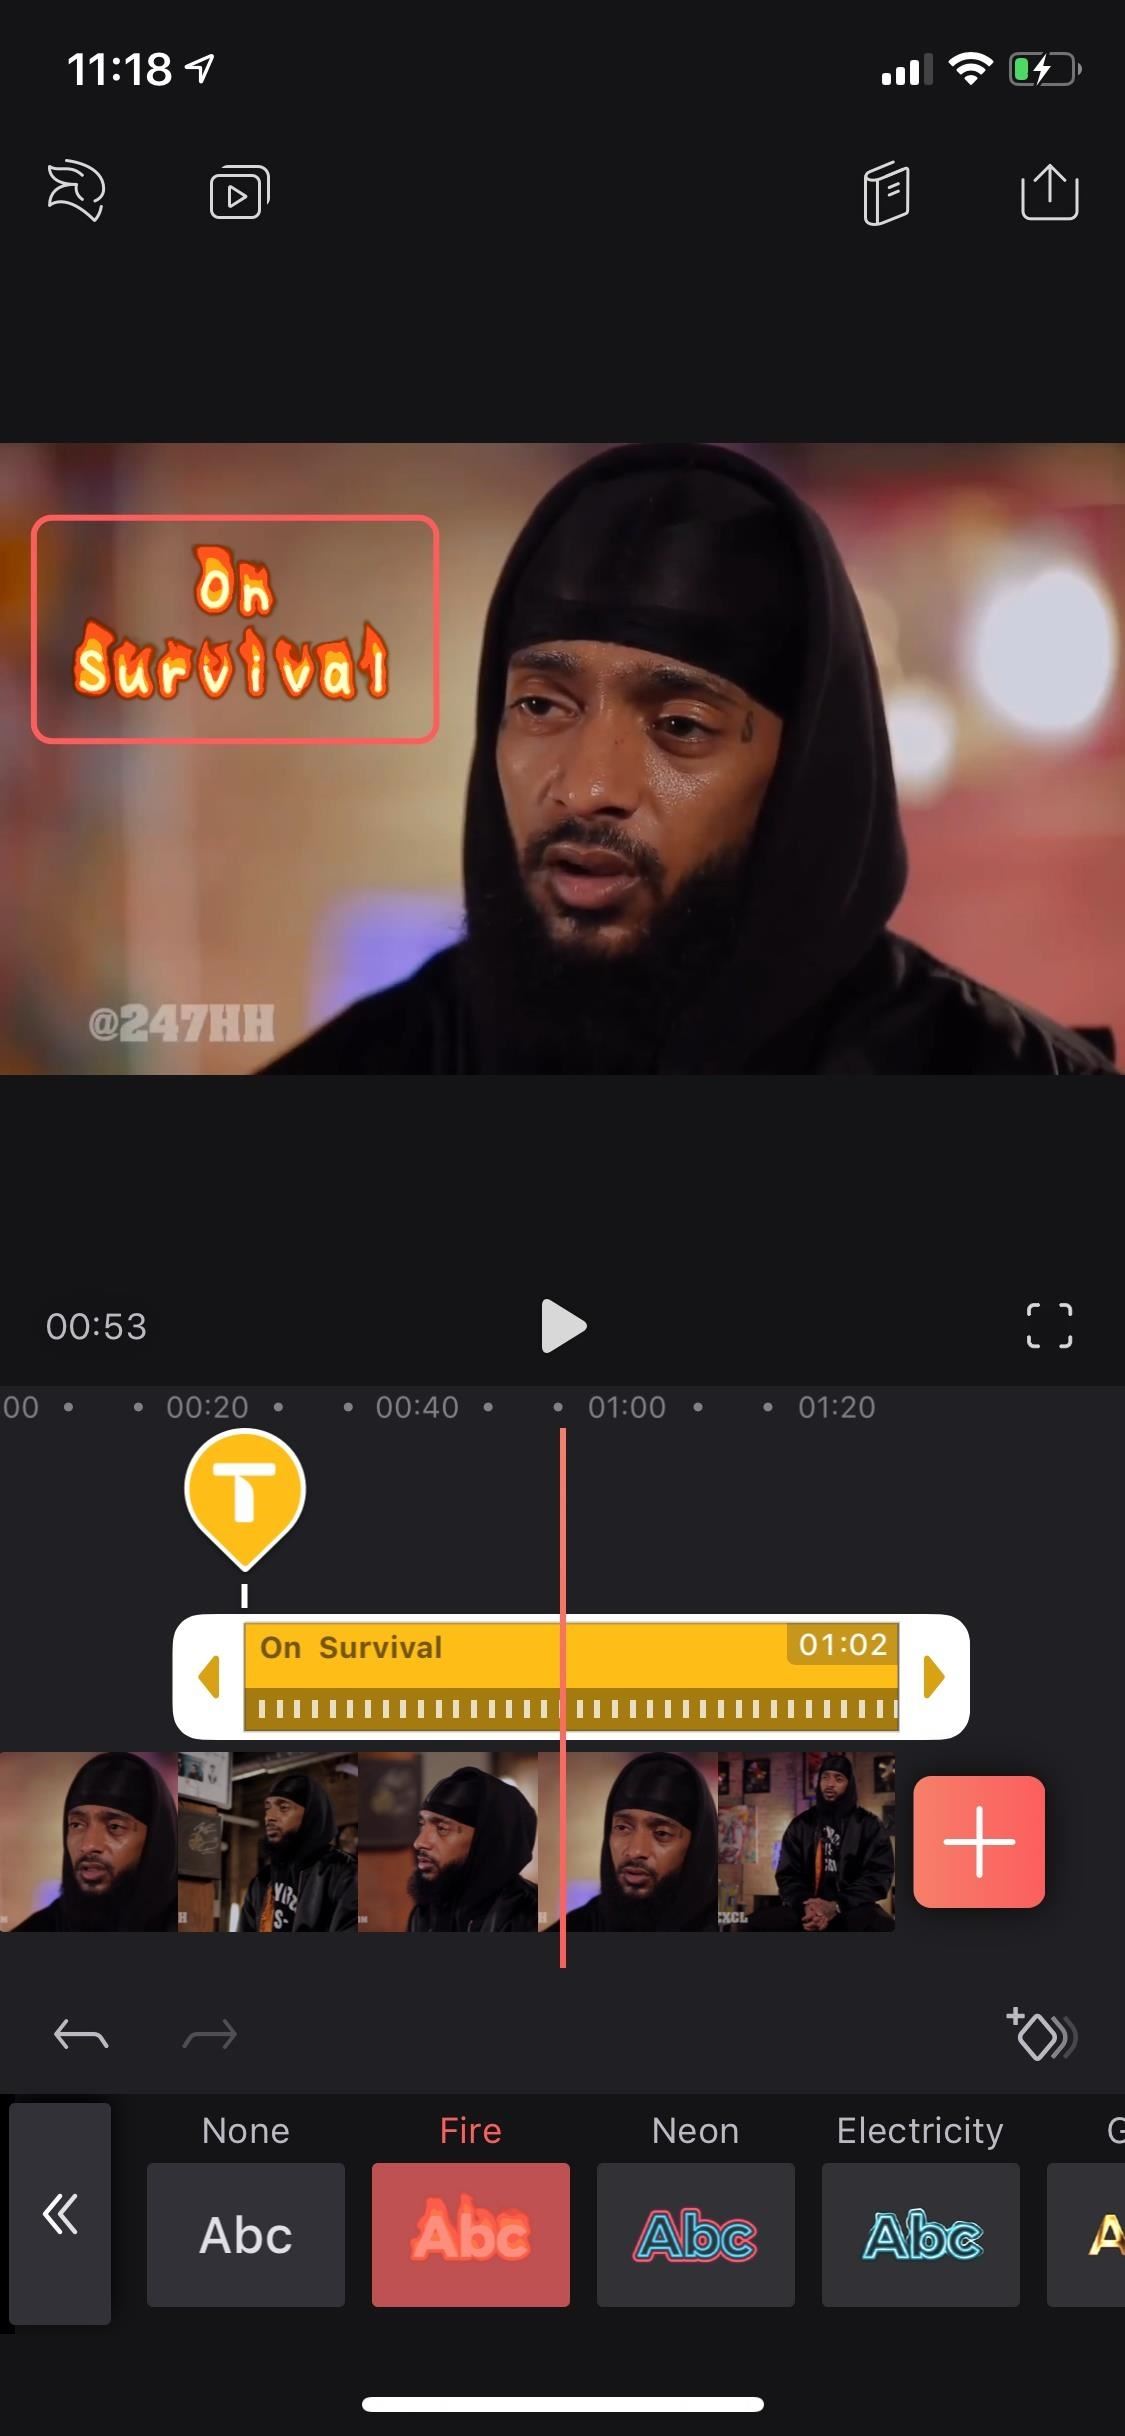
3. Add Animated Effects"Effects" lets you choose from six different animated effects, including ones that make your text look like it's on fire, a color-changing neon sign, or wires with electricity flowing through them. As for the other three effects, they are only included in the pro version of the app, which costs either $5.99 per month, $35.99 per year, or $69.99 for forever.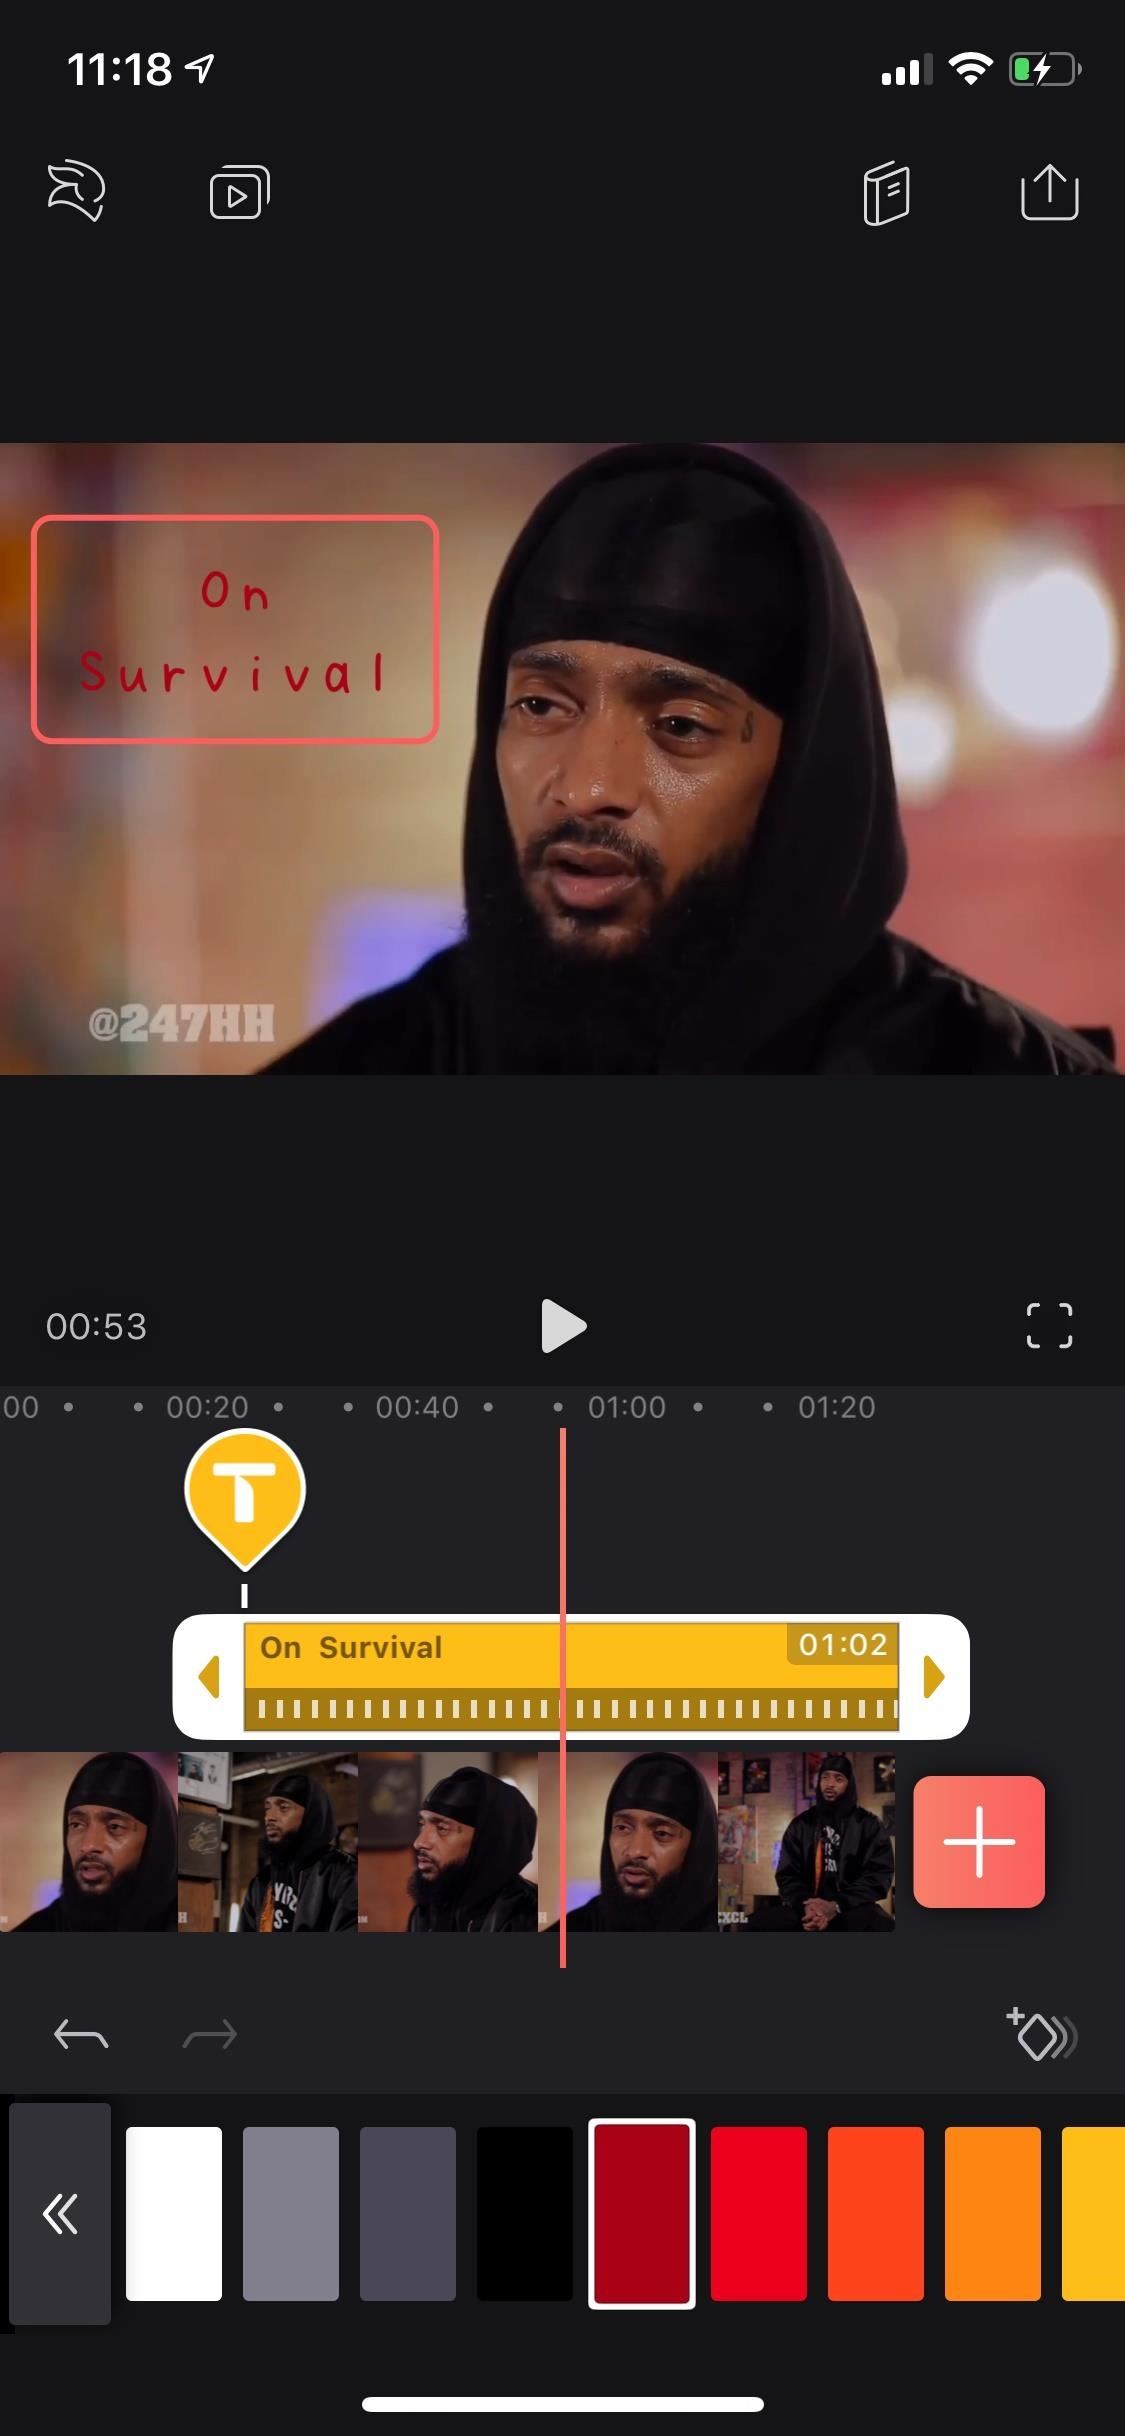
4. Change Your Text's ColorNext in the toolbar is "Color," which, as you can imagine, lets you change the color of the text — even if it already has an effect on it. You have nearly 30 different colors to choose from, but you can't change the color of individual letters or characters in the text box, only as a whole.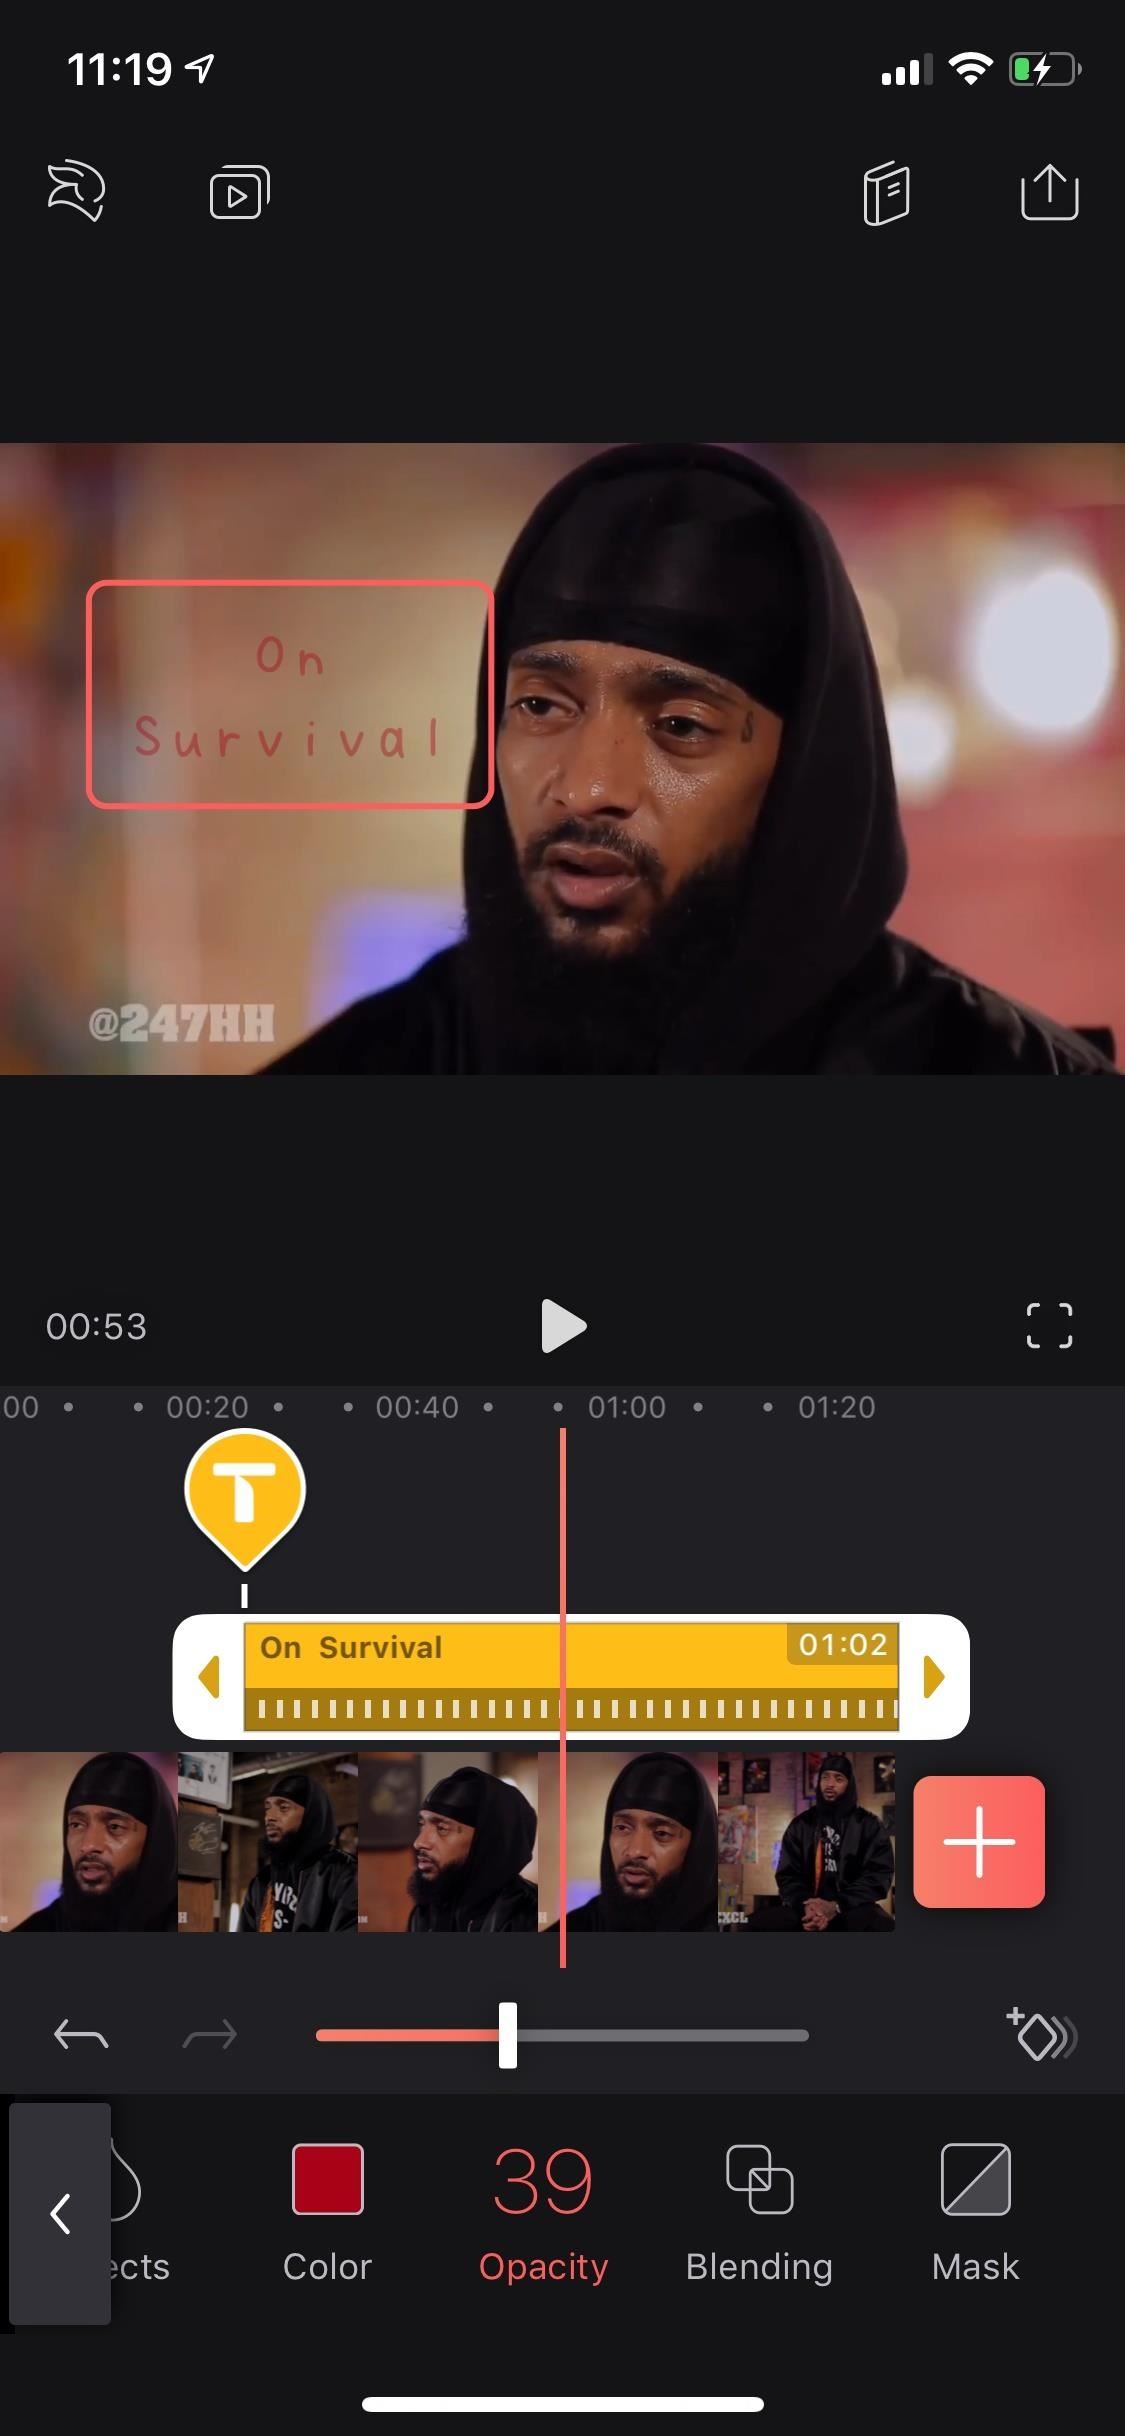
5. Blend Your Text into the VideoHere, I'm going to cover two different tools because they're very similar. First, "Opacity," which lets you slide the marker up or down to change the text's transparency so that you can see some of the video below through the text.The "Blending" tool works the same as opacity, especially if you have the "Normal" option selected. Slide the marker up or down to make the text less or more see-through. Where it differs from the previous tool is that there are more options to choose from. If you've ever used Adobe Photoshop before on a computer, it's just like its drop-down menu for the blending mode of a layer.There are options for soft light, darken, overlay, and color burn, to name a few. The difference between them is how the text box looks: splotchy, dark, burned, and so on. And just like before, you can move the marker up or down on the slider to adjust the opacity. Technically, we think the "Opacity" tool should just disappear since it does the same thing as adjusting the slider in any of the "Blending" modes. But it does serve as a nice reminder of what the opacity for any mode just by glancing at the toolbar.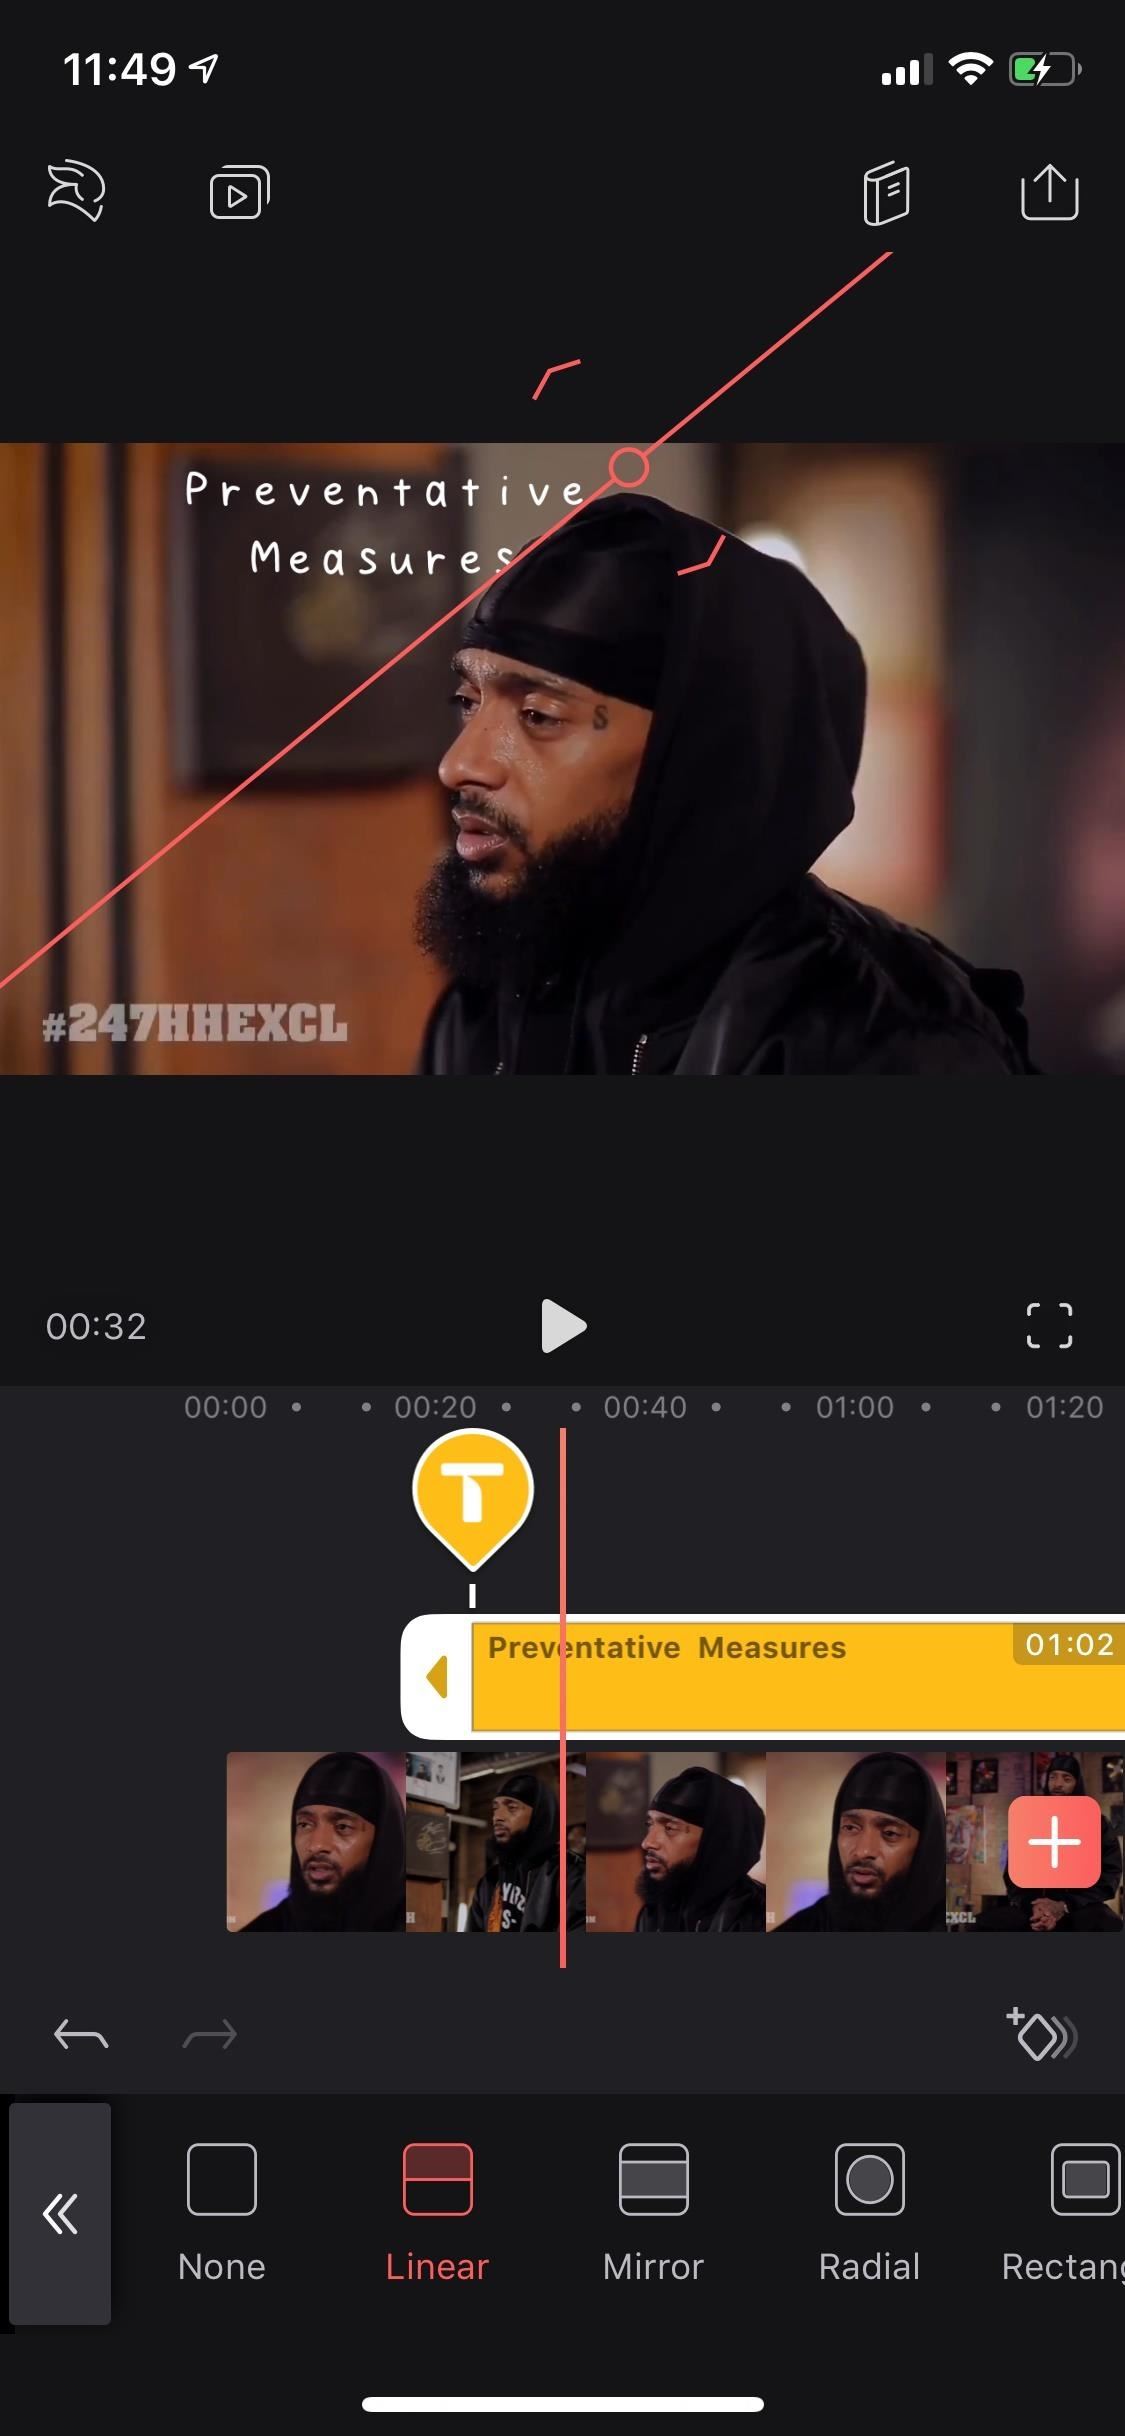
6. Mask Your Text Behind On-Screen ObjectsWith the "Mask" tool, you can hide some of the text, which makes it look like the text is behind an object in the video. For a real-world example, Hulu's The Act utilizes this effect in every show of the series. In Videoleap, you have different mask tools (linear, mirror, radial, and rectangle) to play around with that can better hide your text, depending on the shapes in your video.Now, this tool is pretty tricky to work with, since there's a lot of pinching involved. When you select a mask tool, you'll see a center circle which is where your text will remain visible for sure. From there, if you chose the linear mask tool, you can move it around and use two fingers to spin it how you need it. Then you can move the arrows further away from the line to spread the effect out with opacity changes away from the line.For the other tools, you can also move them around, spin them with two fingers, and add opacity to the text outside of the effect box, but you can also pinch in or out the effect. Additionally, on the rectangular mask tool, you can drag the arc icon to cut the text off a little inside the effect box. To get the hang of this all, you'll just have to play around with it. But since you're subject may be moving, you'll want to add keyframes too, which we'll discuss later in Step 3.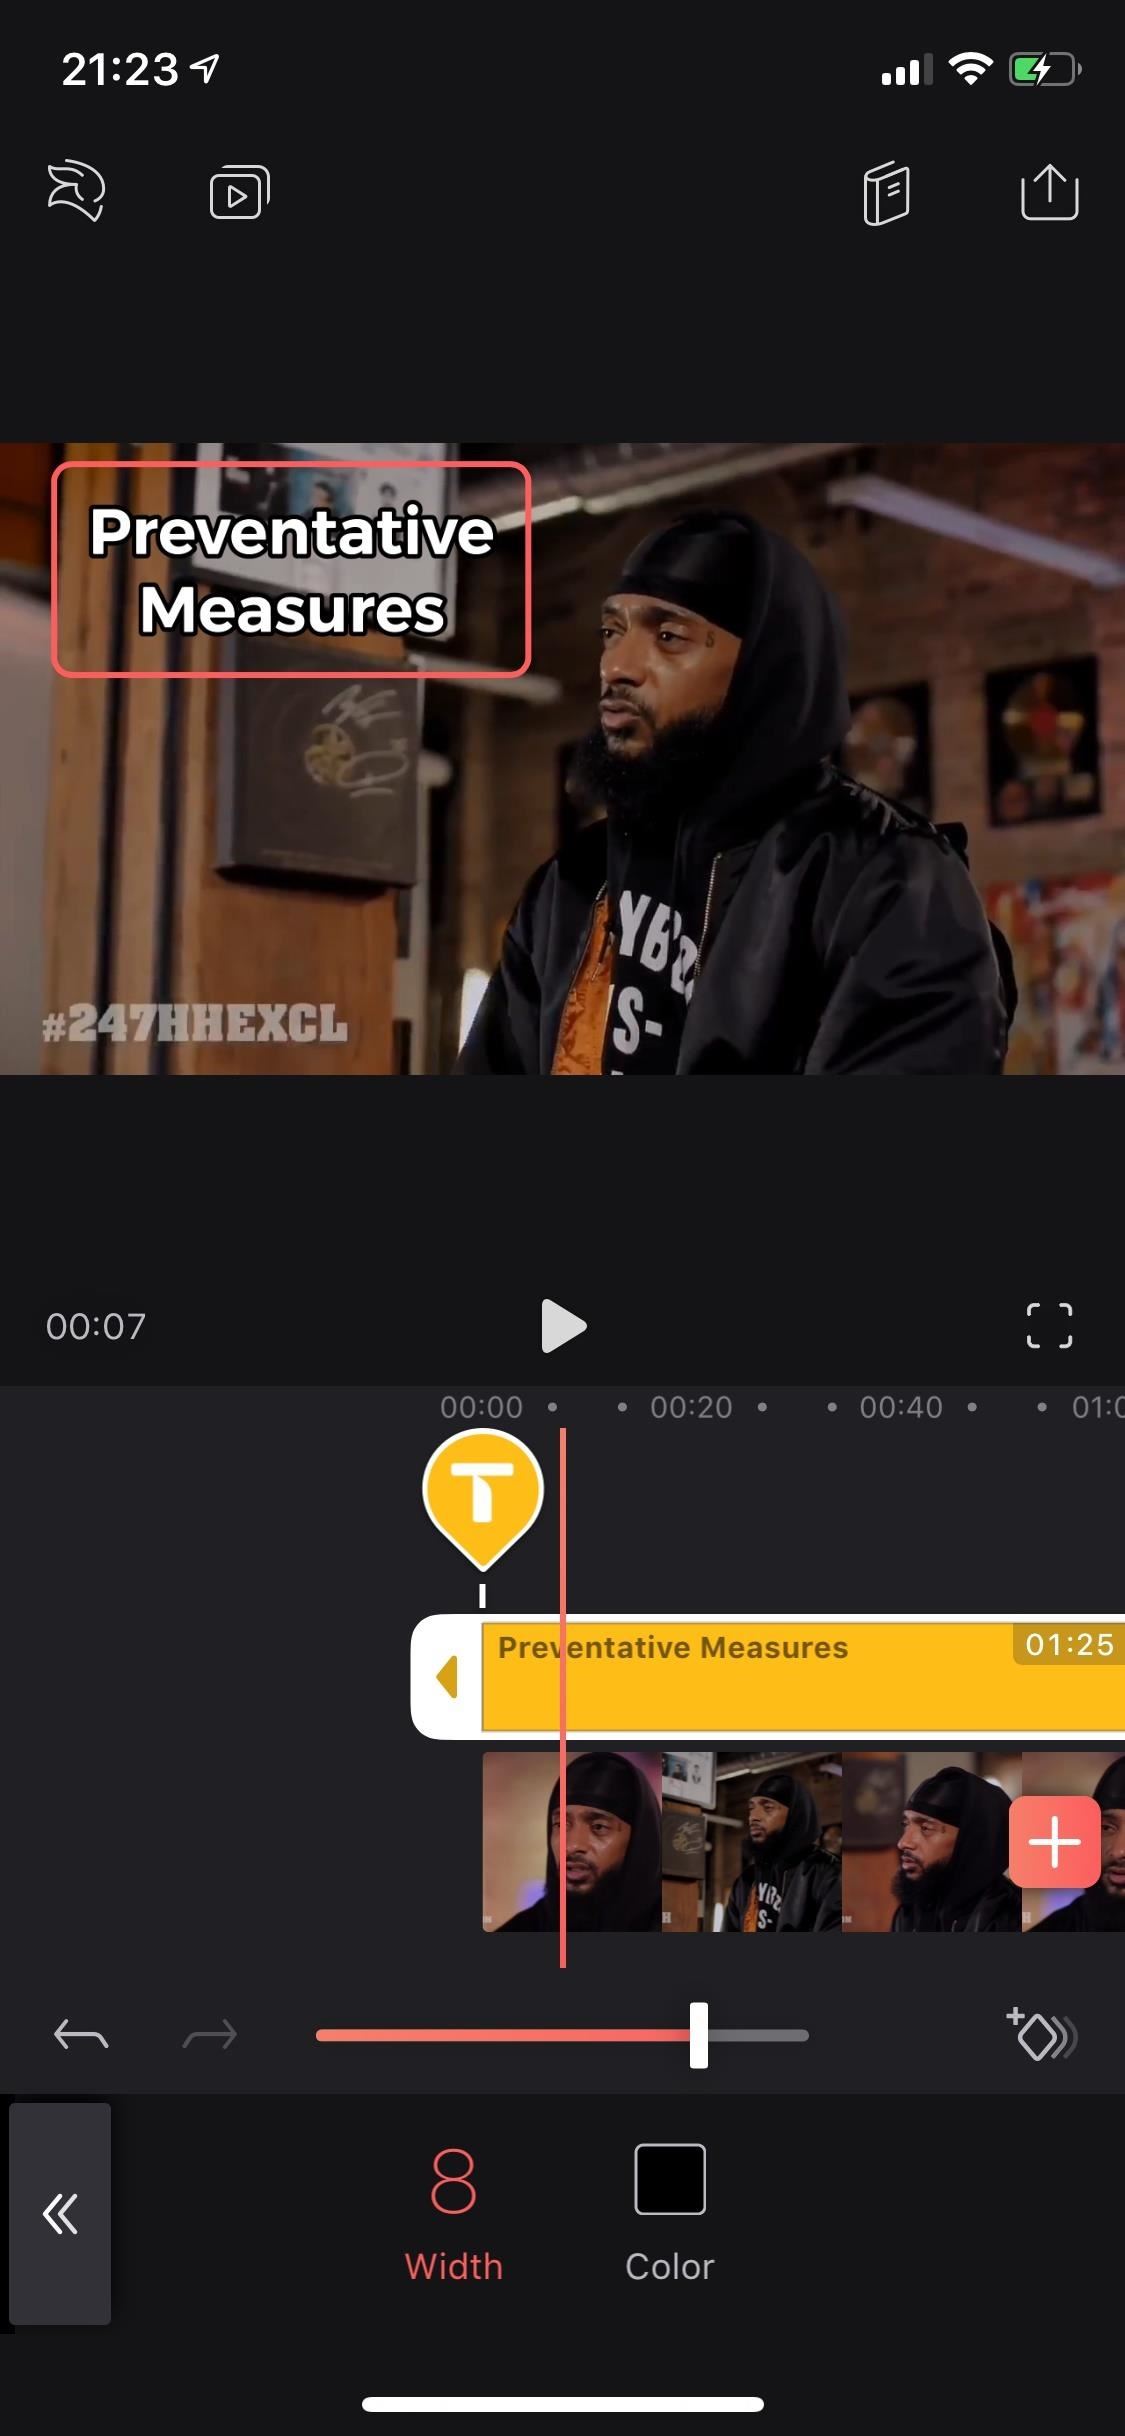
7. Add a Stroke Around Your TextThe "Stroke" tool adds an outline around the text. You can change the width of the outline, from zero to 10 points, as well as the color of the stroke.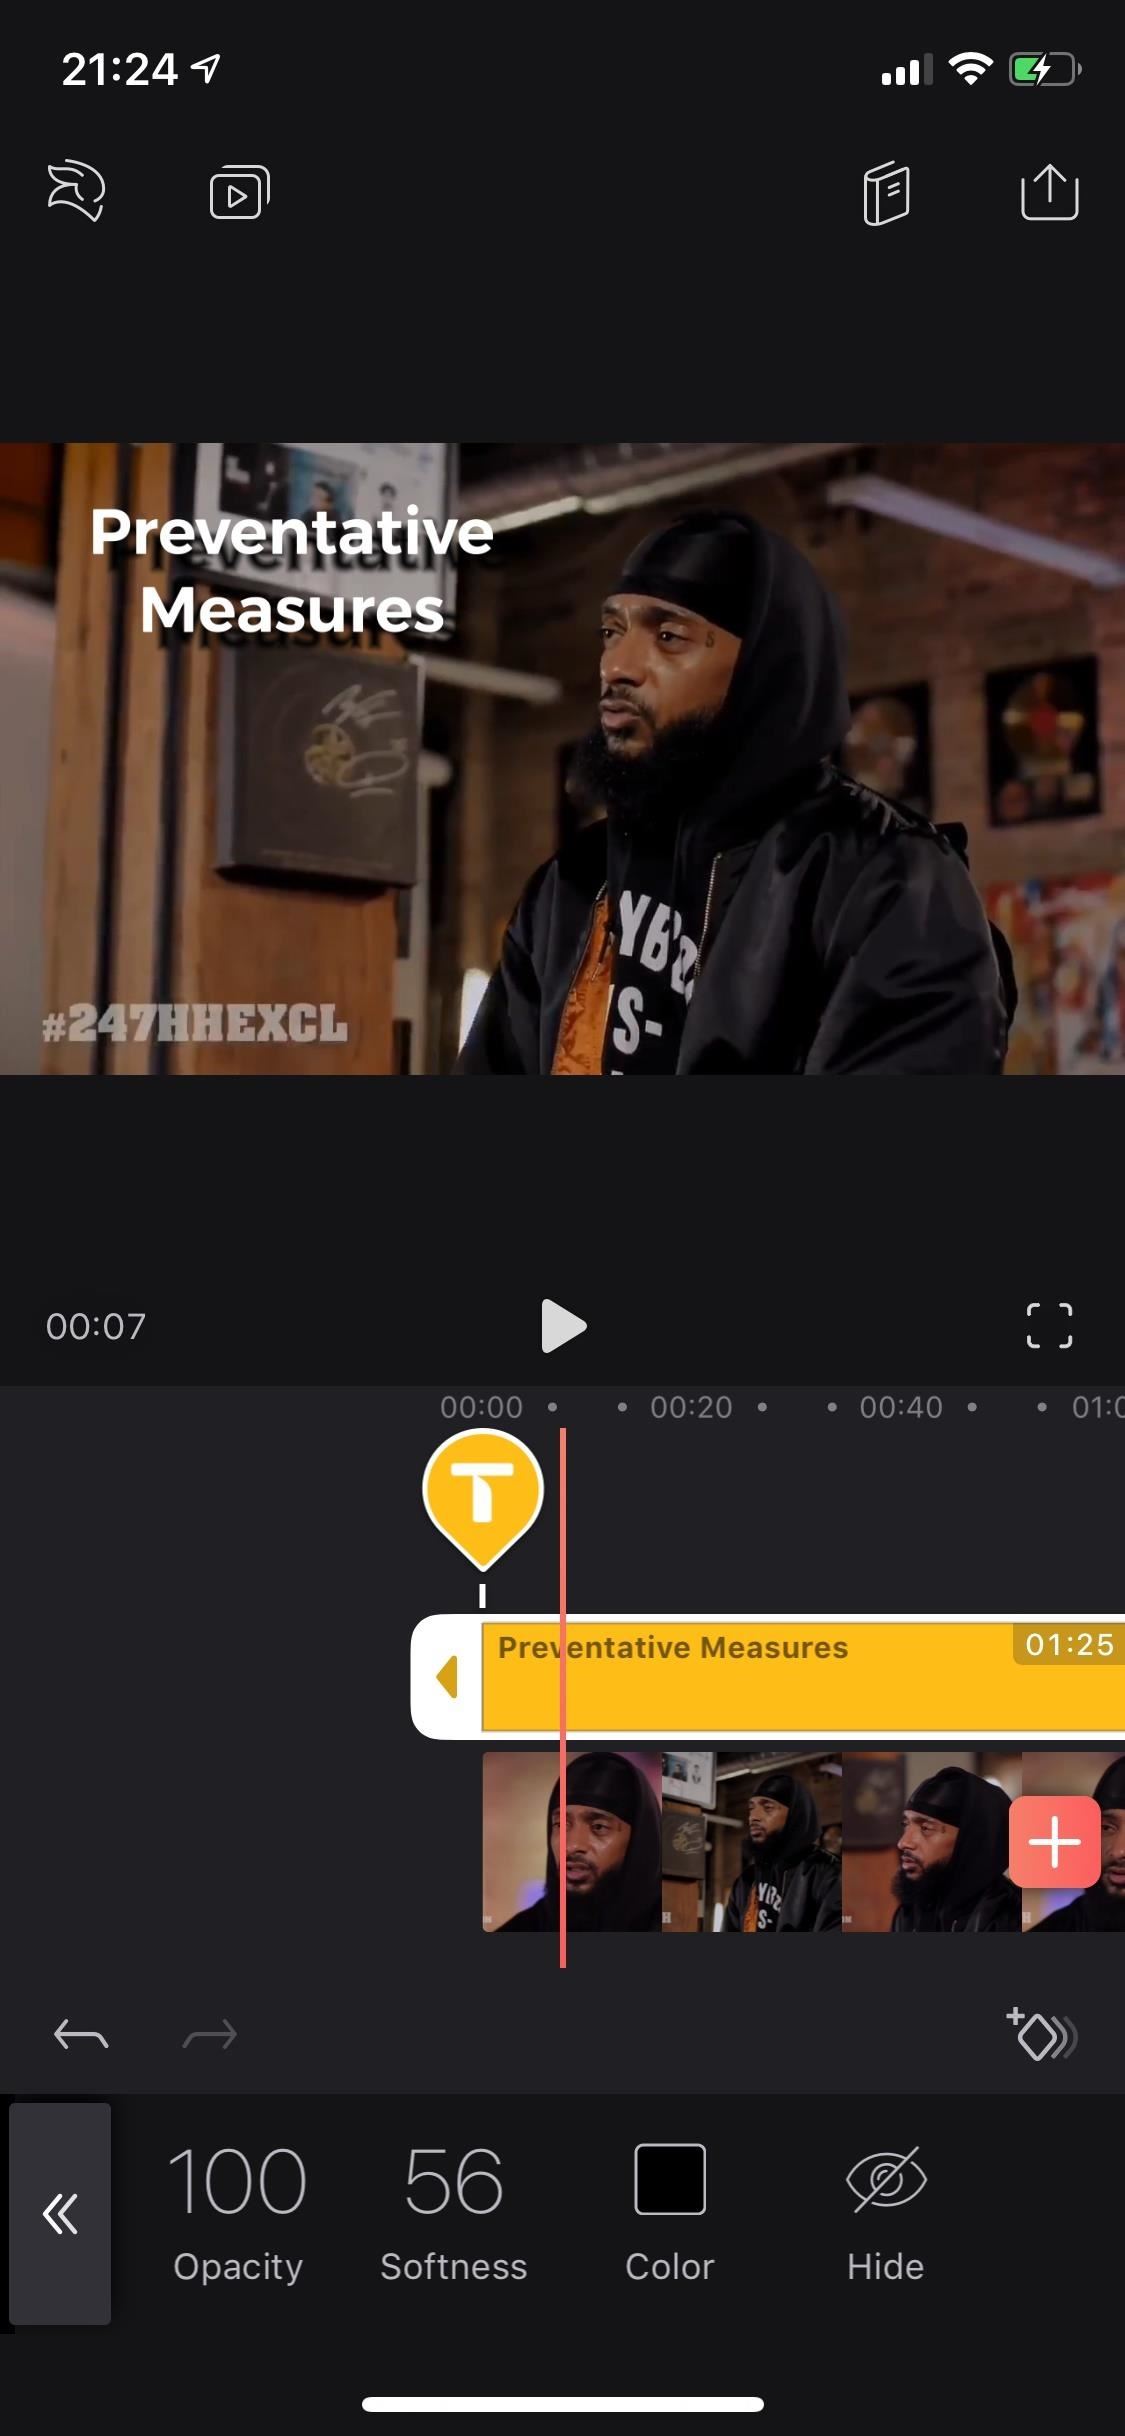
8. Add a Shadow to Your Text"Shadow" adds a drop-shadow behind your text. A red circle will appear, which is the center of the shadow. If you move the circle around, it moves the shadow as well, so it can be directly behind the text, a little off-center, or way away from the text. You can change the opacity (its transparency), softness (for the edges of the shadow text), and color of the shadow (if black isn't what you want). You can also choose to hide it, which is better than deleting it if you think you'll like to use the shadow you customized later.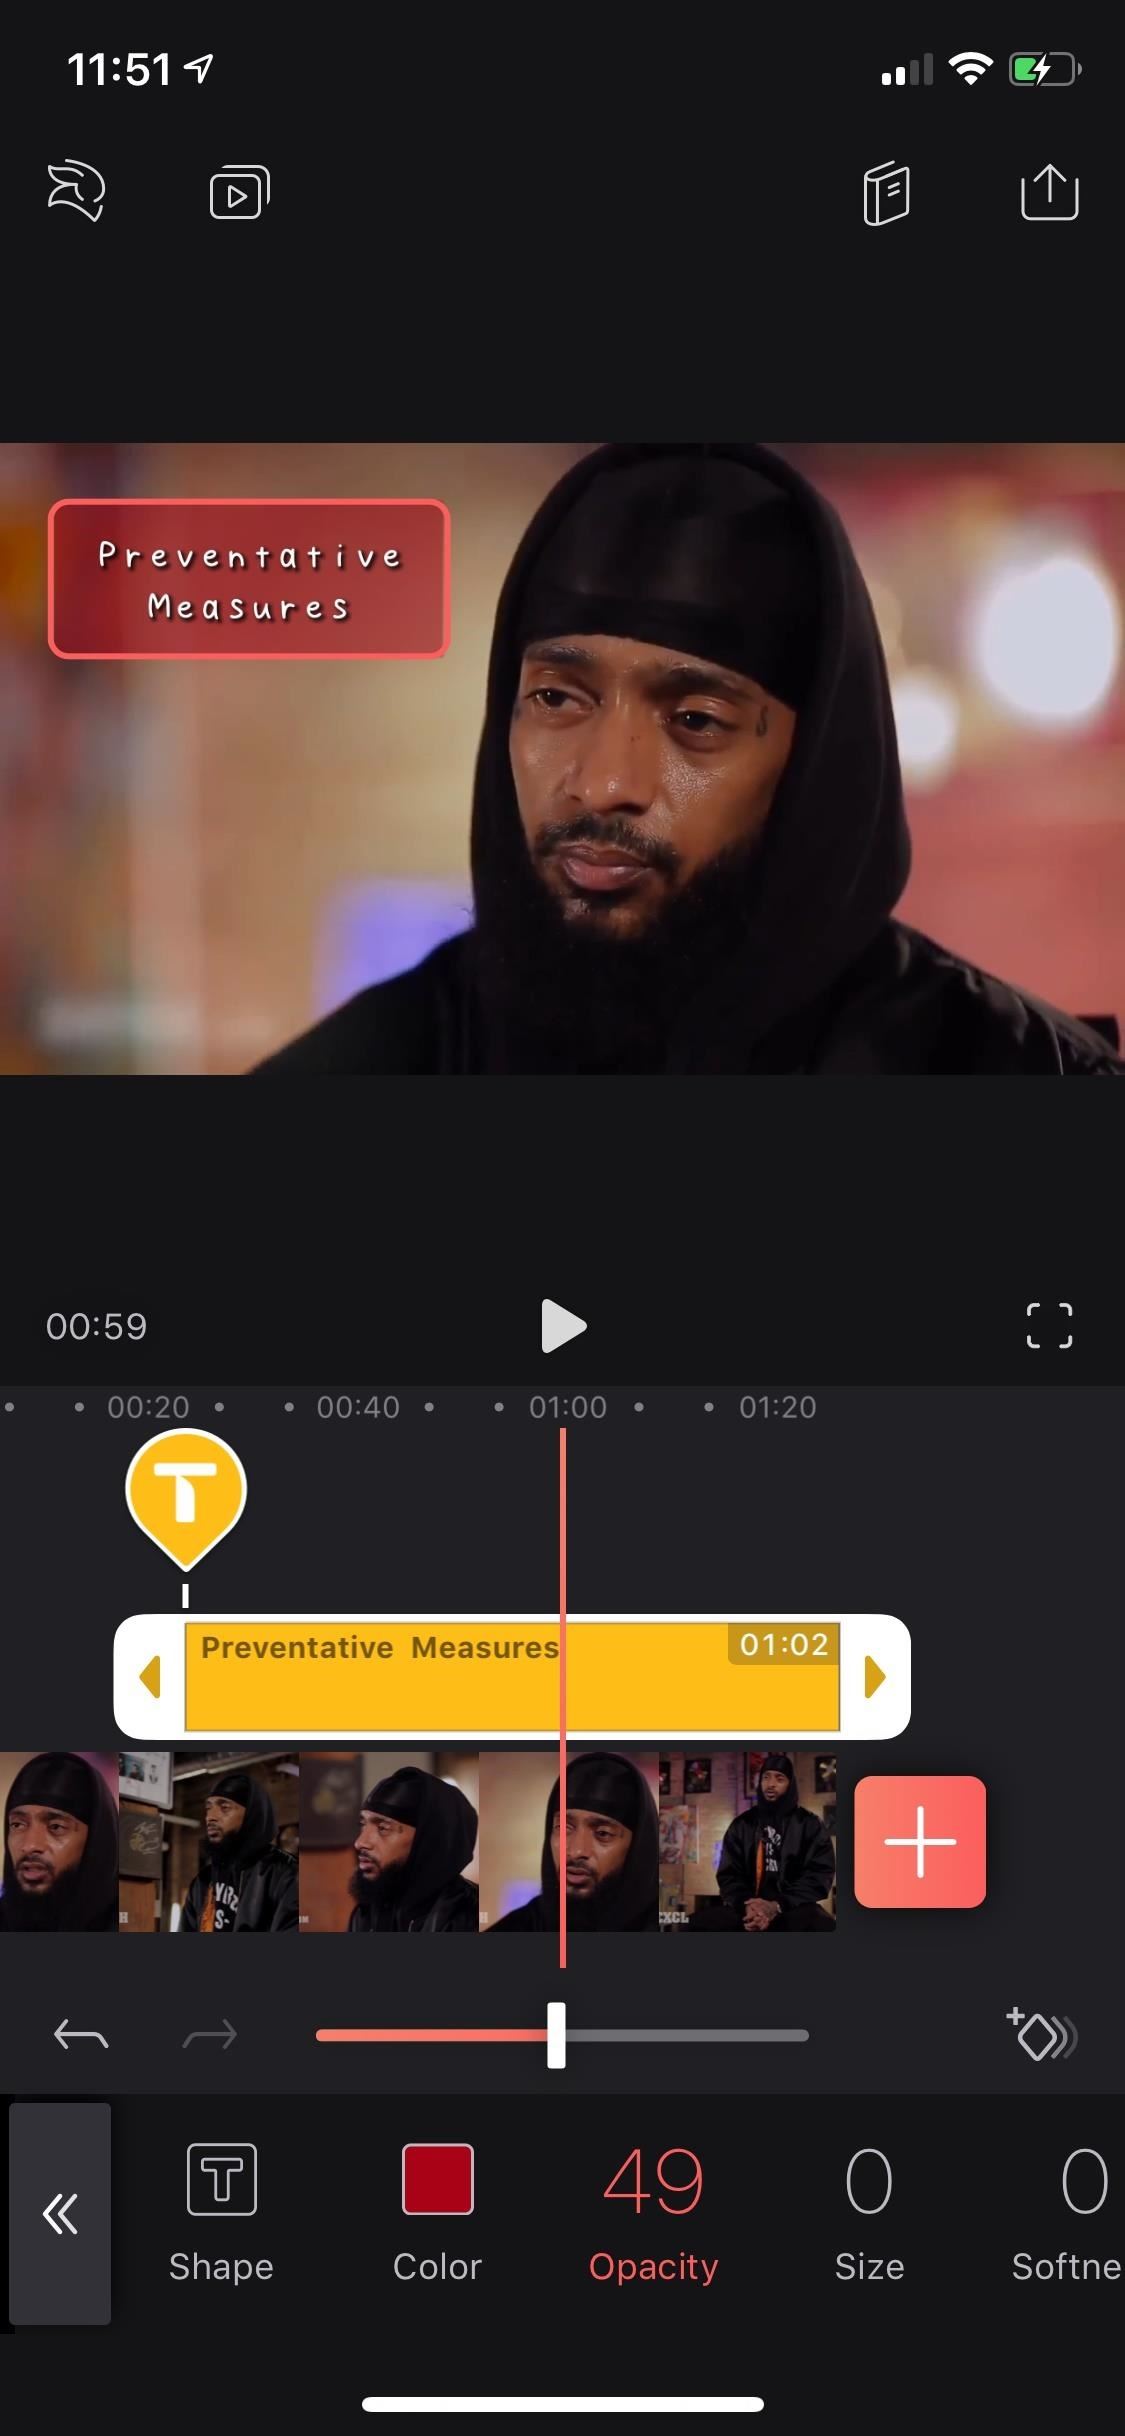
9. Make Your Text Stand Out with a BackgroundThe "Background" tool places a colored or transparent background behind your text. With the "Shape" sub-tool, you can make the background fill the text box, appear as a strip across the video, or turn it into a hollow outline. The "Color" sub-tool is pretty self-explanatory, as well as "Opacity," which just lets the video in the other layer shine through. The "Size" sub-tool determines how large the background or outline is, while the "Softness" will make the box rigid at zero or a complete blur at 100.
10. Adjust Your Text's Alignment & SpacingTap on "Align" to change the alignment of the text to either left, center, or right justification, and use "Spacing" to squeeze the text together or give it room to breathe, as well as to create a larger or smaller gap between lines, if the text is divided that way.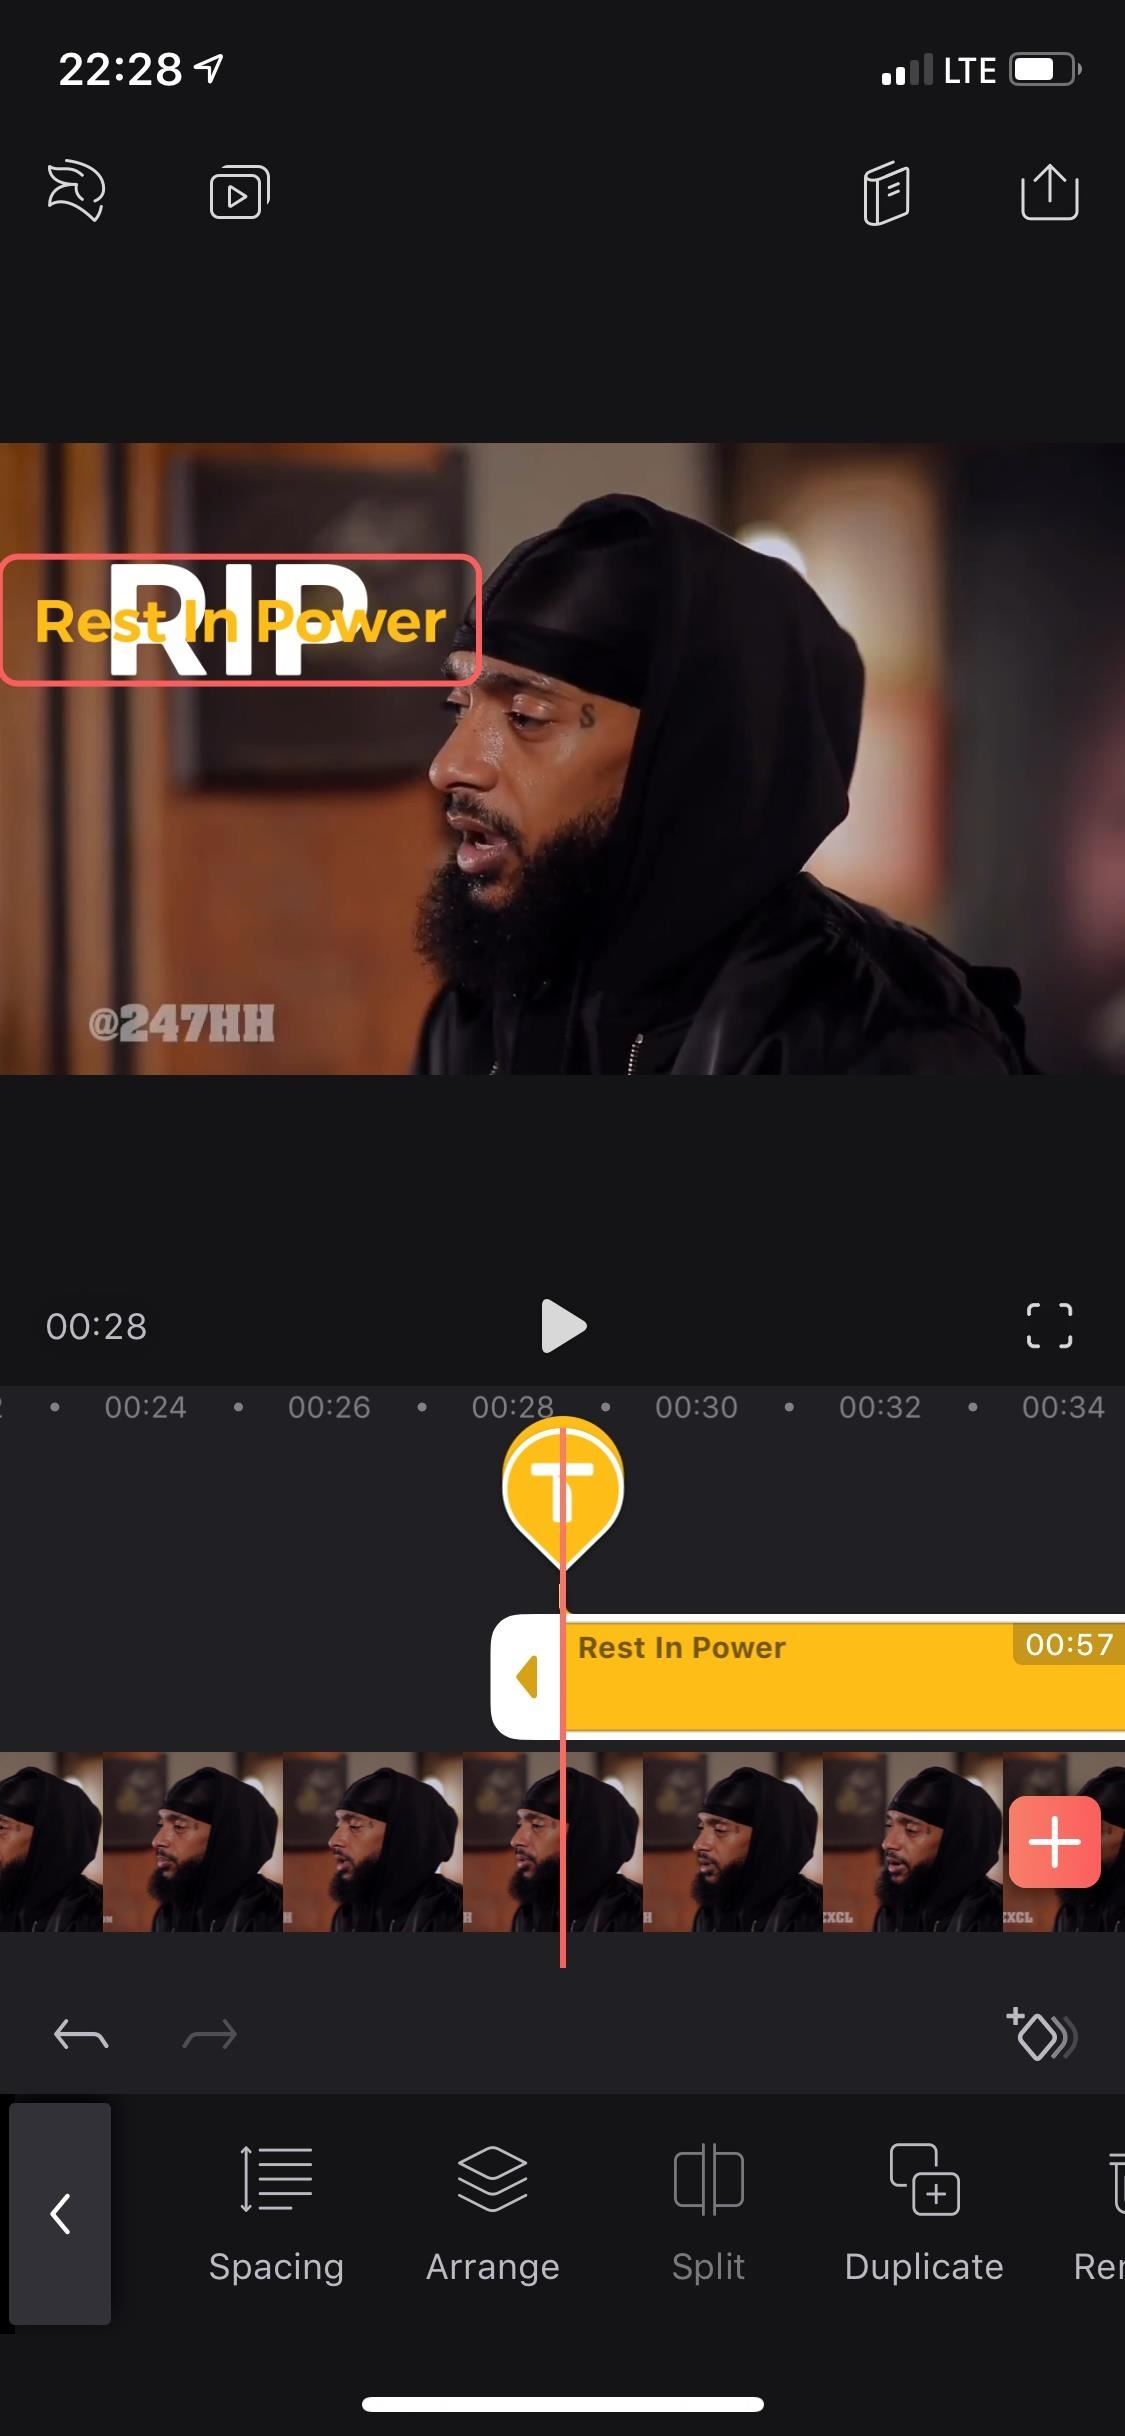
11. Prioritize Text Layers That OverlapWith the "Arrange" tool, you can place the text behind or on top of other text layers. However, with the free version of Videoleap, you're restricted to just three layers, so the "Arrange" tool isn't incredibly useful unless you've only got a few text layers you're attempting to organize.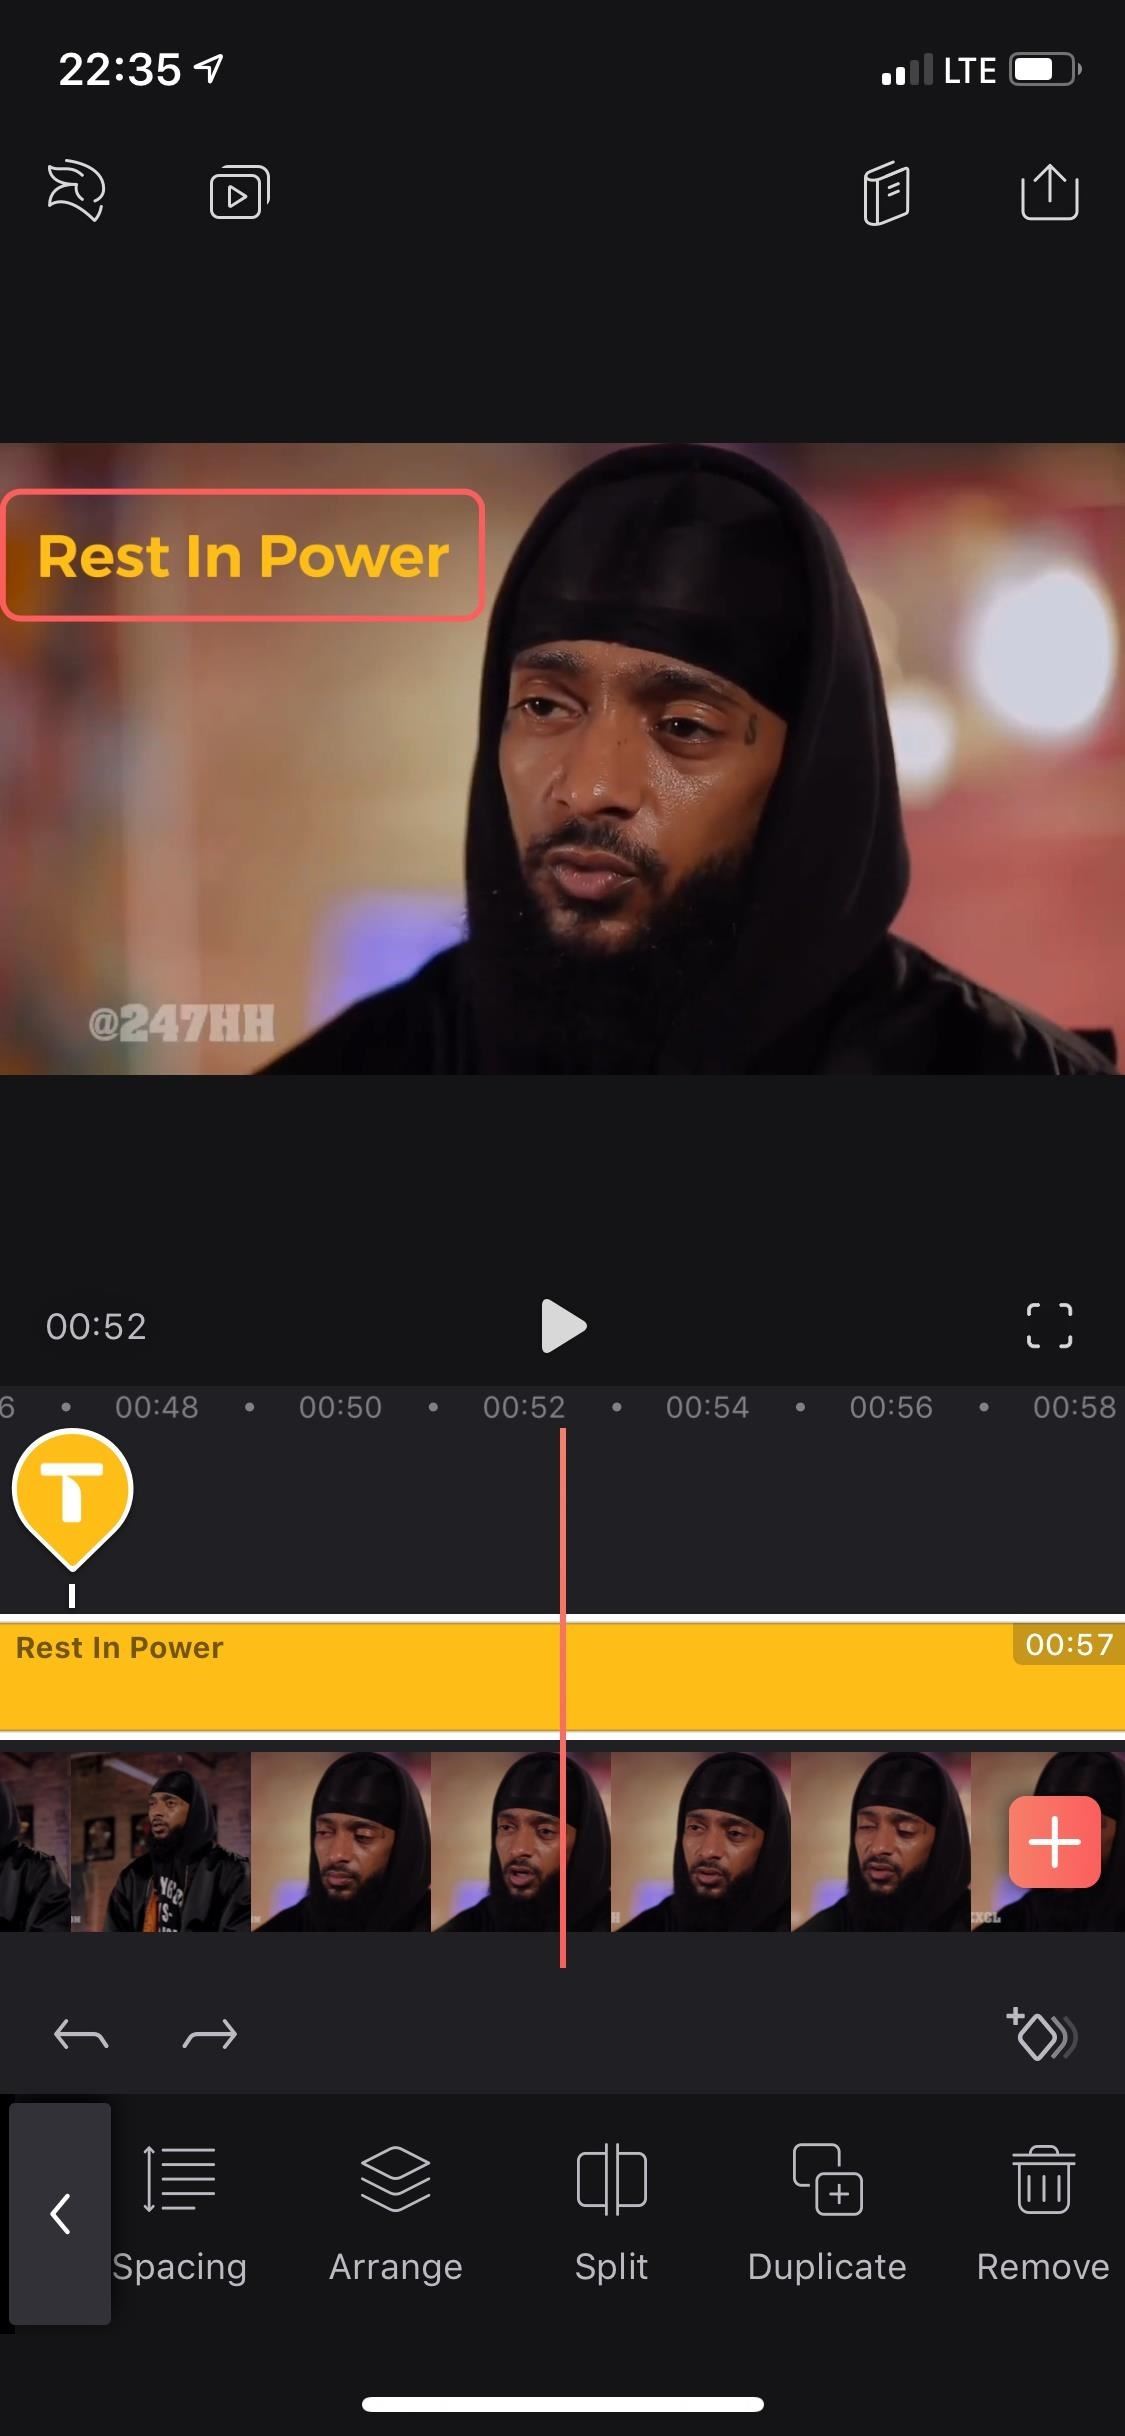
12. Split Your Text Up into Two ClipsUse "Split" to break up the text clip and move it to a different place in the video. When I say split, I mean it cuts the text clip in half, not the actual text in the text box. Simply move the playhead to the moment you want to split the text and hit "Split." You can then tap-and-hold either portion of the text clip and move it across your project timeline where needed.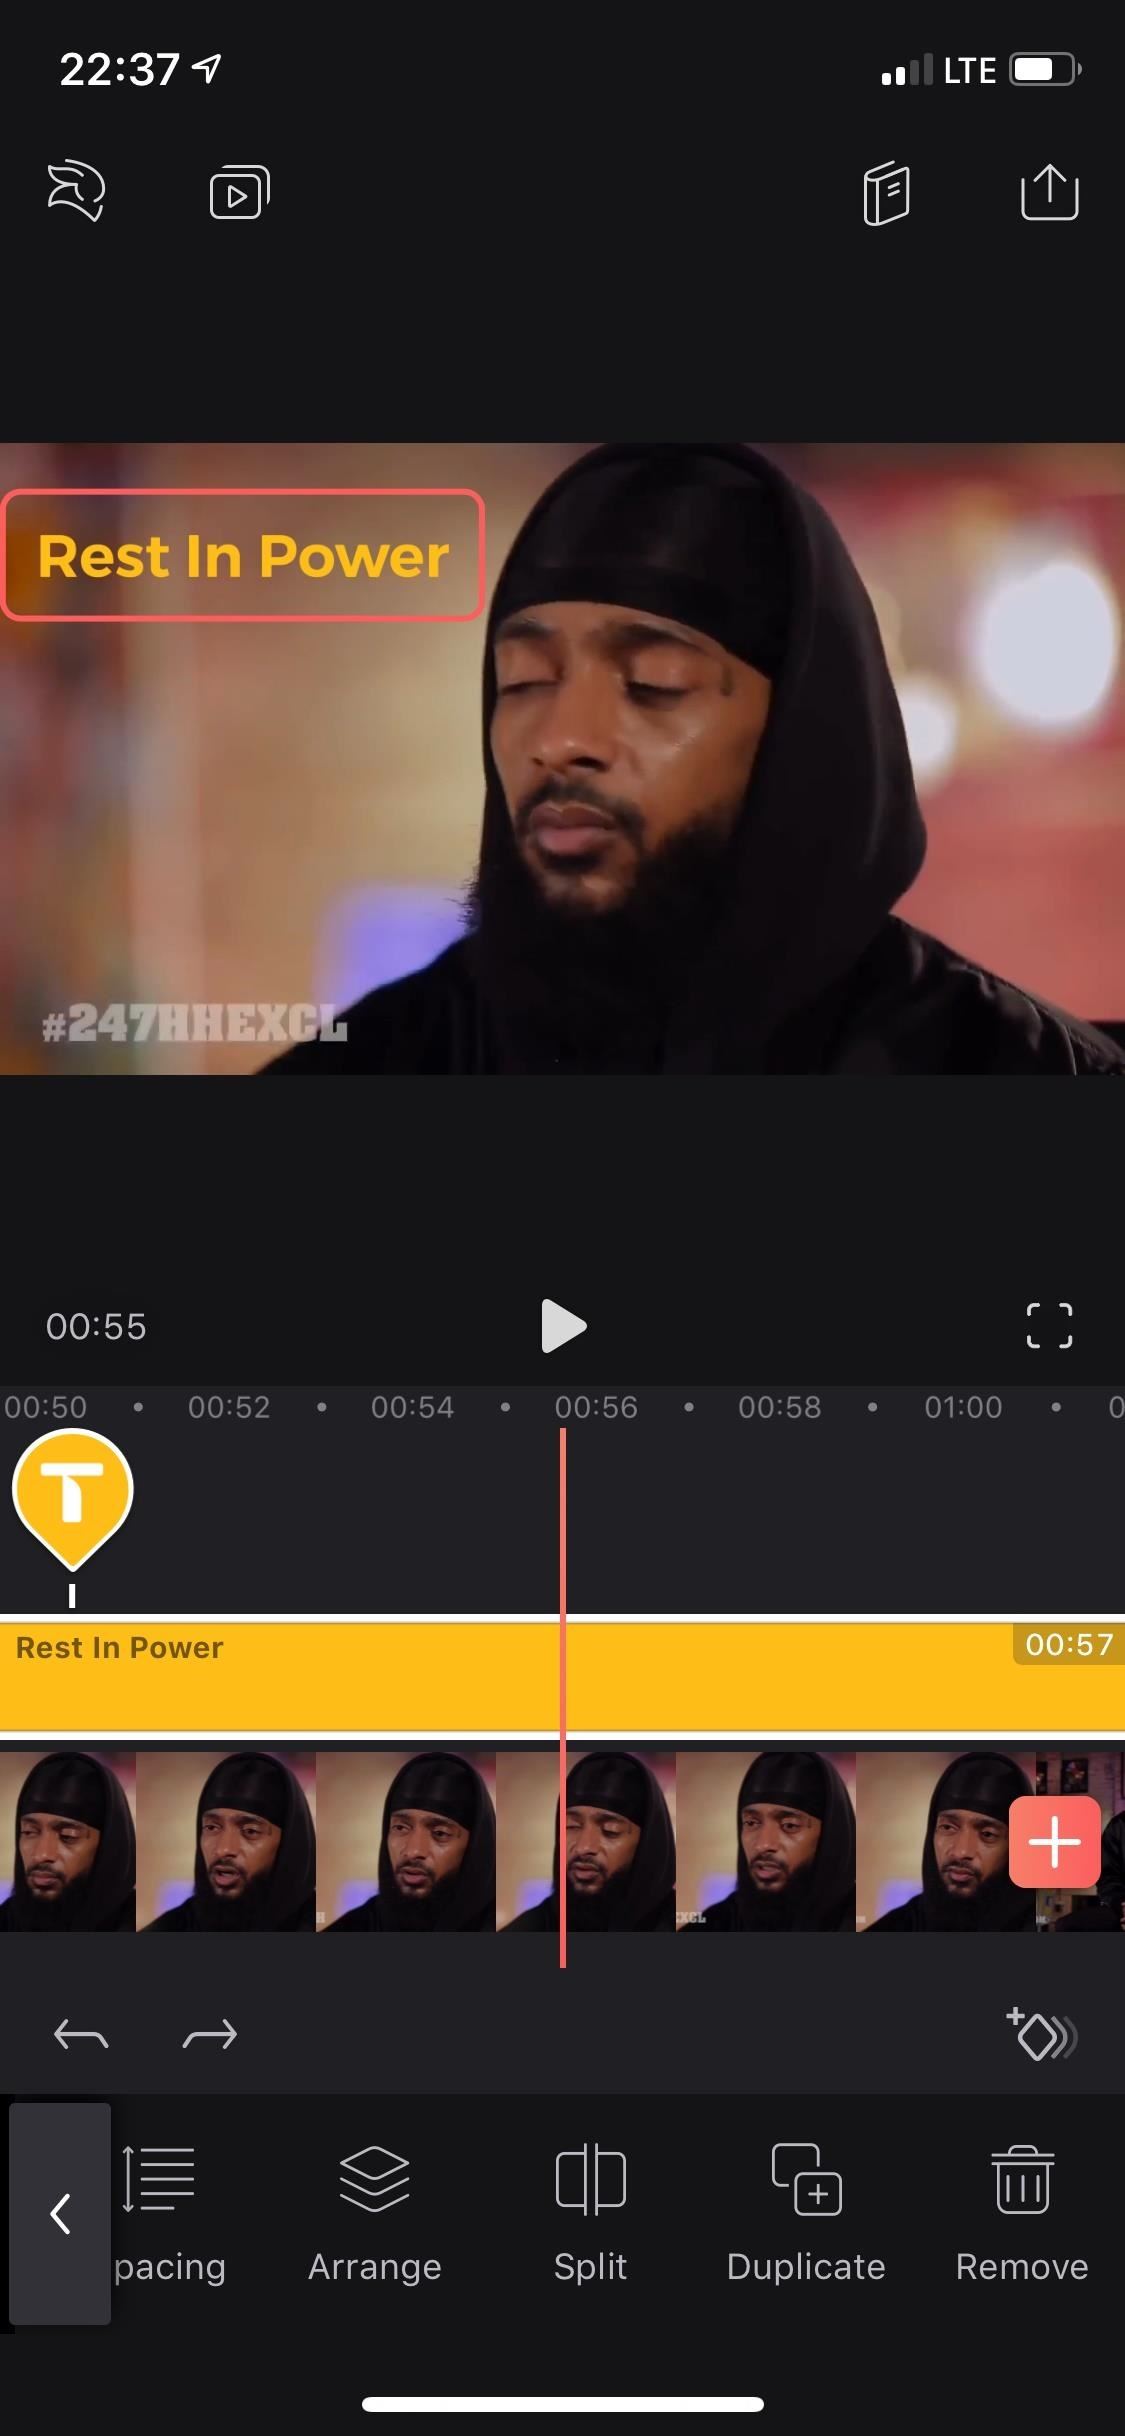
13. Duplicate Your Text Clip"Duplicate," as you probably can guess, creates an identical twin of the text clip. This adds an extra layer to your project, but there are only three layers available in the free version, so you can't really use this tool as freely as you would with the pro version. You can, however, move it around like with when using the "Split" tool above.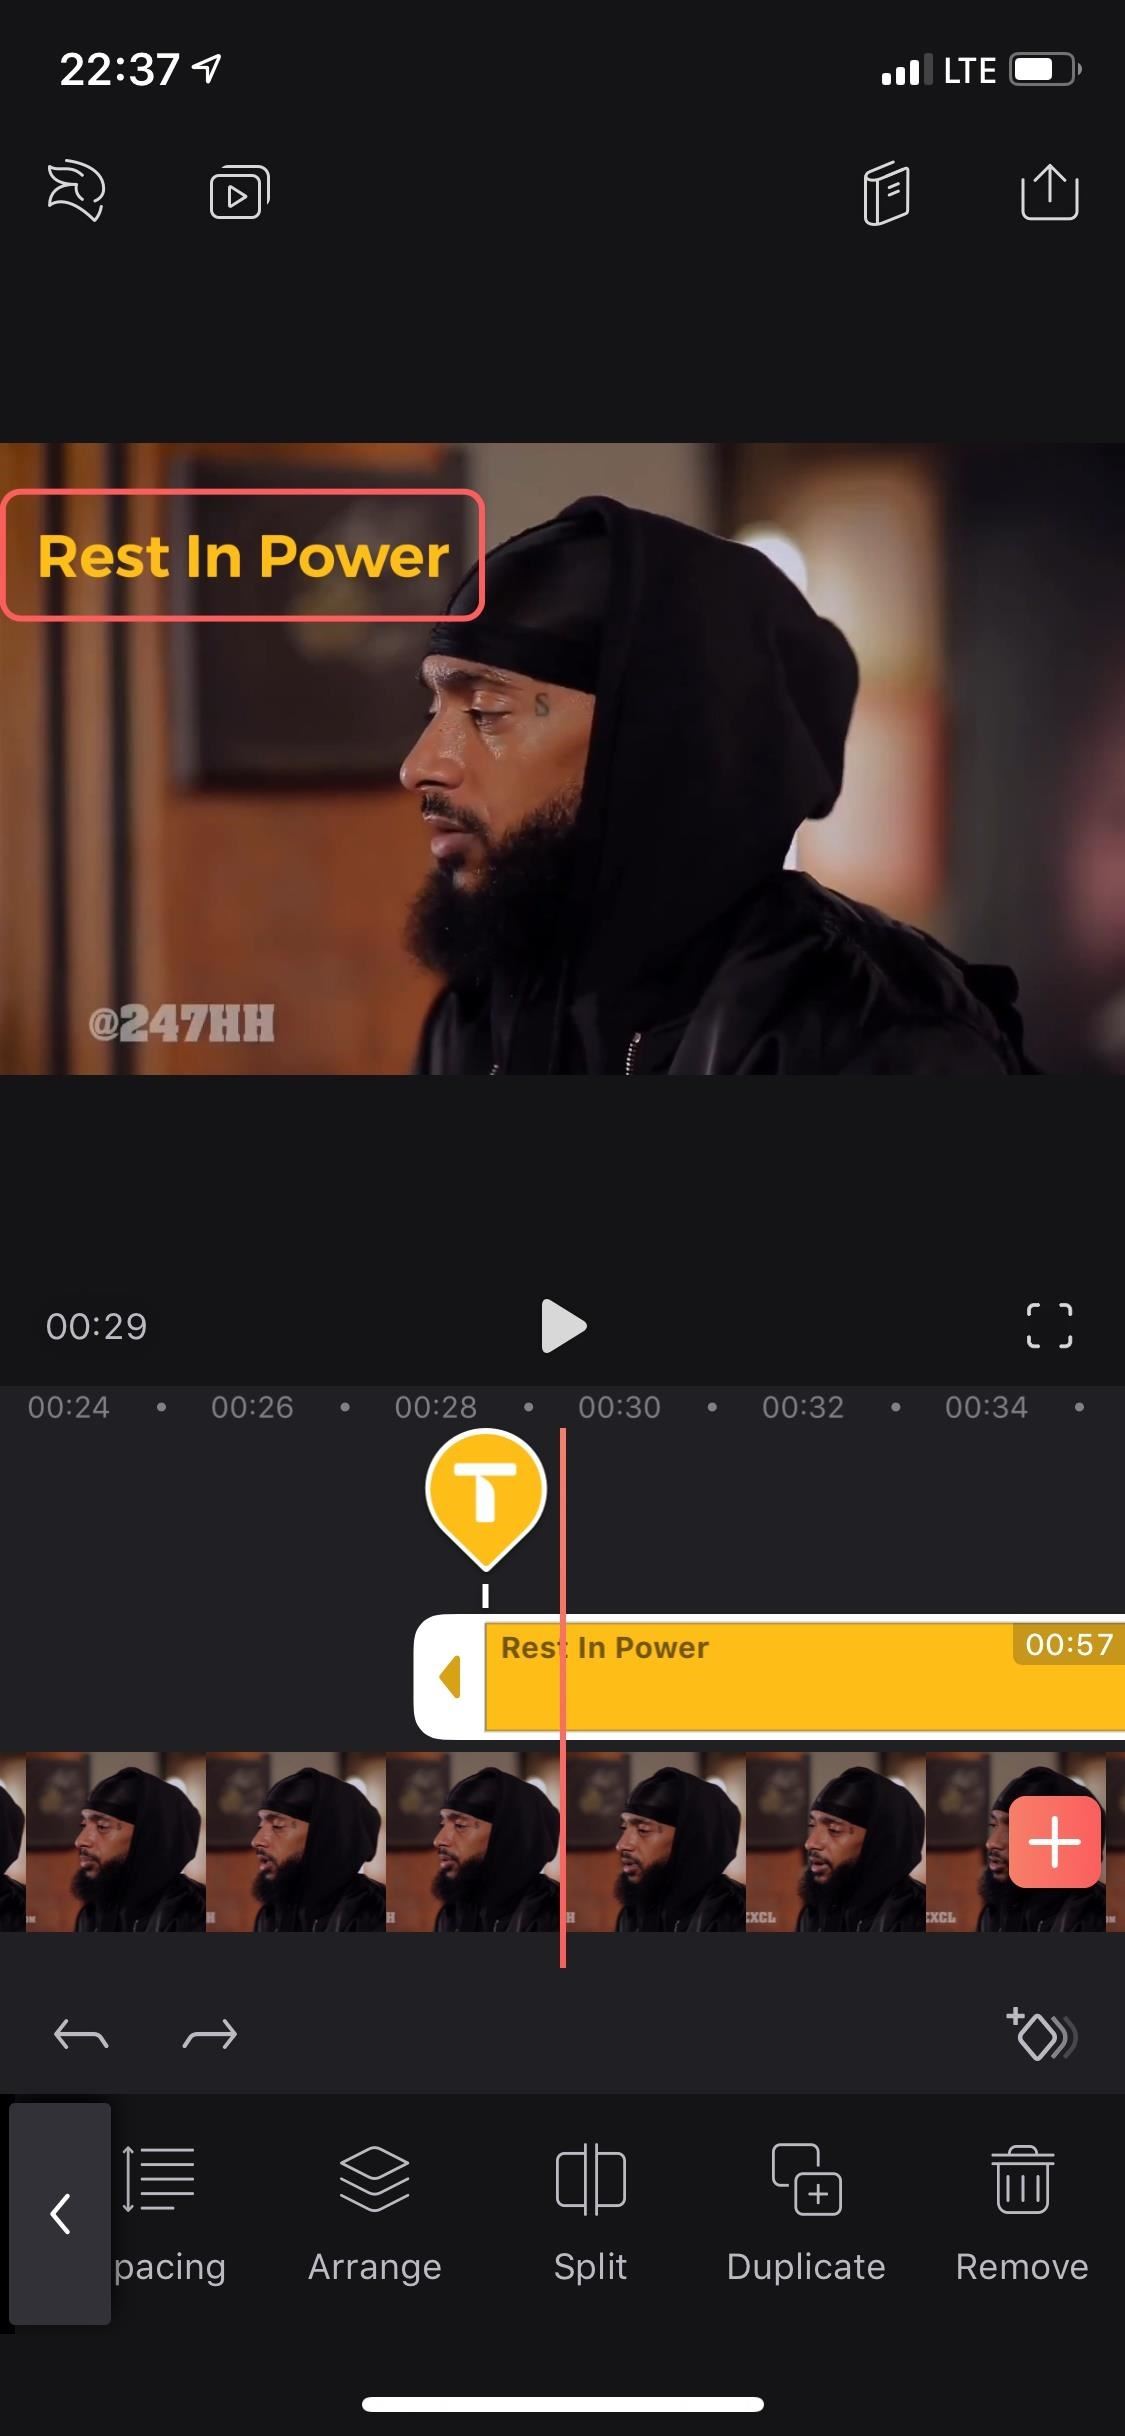
14. Delete Your Text Clip to Try AgainFinally, you can tap on Remove to delete the text layer. You can also tap-and-hold down on the text layer in the timeline, then drag and drop it down in the trash can that appears to erase it. If you delete it because you're unhappy with the results, you always go back and try again from scratch.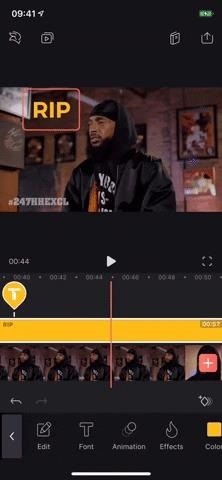
Step 3: Use the Keyframe Tool to Animate TextWith any effect selected, or even just the text layer itself, you'll see a diamond symbol with a plus sign above the toolbar on the right whenever the playhead is in the layer somewhere. This is the "Keyframe" tool, which is used to add manual animation to your text. You can use it to move text from one part of the video to another or change the color of the text throughout, for example. If you want to learn more about how to use keyframes, check out our full guide. This article was produced during Gadget Hacks' special coverage on smartphone-based video creator tips for filming and editing. Check out the whole Videography series.Learn How: How to Use Keyframes to Animate Effects & Create Custom Transitions in Enlight Videoleap for iPhoneFollow Gadget Hacks on Pinterest, Reddit, Twitter, YouTube, and Flipboard Sign up for Gadget Hacks' daily newsletter or weekly Android and iOS updates Follow WonderHowTo on Facebook, Twitter, Pinterest, and Flipboard
Cover photo, screenshots, and GIFs by Nelson Aguilar/Gadget Hacks
In this video, i will show you how to set up and play your favorite retro games on the Nvidia shield android tv using RetroArch. RetroArch Web Page - https:/
[Guide+Video] How to Play PC Games on Android - XDA Forums
How To SSH Into Your iPod Touch 1G, 2G, iPhone 3G, 3GS Via USB teasermaniac. How To Jailbreak 3.1.3 Firmware on iPod Touch 1g, 2g & iPhone 1g, 3G - RedSn0w - Duration: 7:51.
How to SSH into iPhone, iPod Touch & iPad Through WinSCP?
jaxov.com/2010/06/how-to-ssh-iphone-ipod-touch-with-winscp/
The following step-by-step guide will explain you how to SSH your iPhone, iPod Touch and iPad using WinSCP. For those who don't know, SSH stands for "Secure Shell" and its a network protocol which allows you to transfer files and execute shell commands over a secure channel.
How To SSH Into iPhone/iPod Touch - YouTube
It's official—the HTC One is here and it's the most feature complete, beautifully built Android Phone to date. Get the details on the latest mods here as we show you how to get more out of this powerhouse—and hit up the forums to share your thoughts and opinions, and customizations.
How to fix a broken diet: 3 ways to get your eating on track
finsta definition. This page explains what the abbreviation "finsta" means. The definition, example, and related terms listed above have been written and compiled by the Slangit team. We are constantly updating our database with new slang terms, acronyms, and abbreviations.
Urban Dictionary: Finsta
How Can I Watch My iPhone/iPad Videos via Chromecast? Jason Fitzpatrick @jasonfitzpatric Updated July 12, 2017, 12:18pm EDT If you have an iOS device and Chromecast , the big players all cast just fine (like Netflix) but when it comes to streaming the local content on your device to your Chromecast it's a bit of a hassle.
8 Free iOS Apps to Stream Videos and Photos to Chromecast.
To use the Google Lens feature, you'll need to have Google Photos installed on your iPhone or Android phone. Other than that, there's very little setup required. You don't even need to upload pictures to the cloud — Google Photos will automatically draw from your photo library and use all the locally stored images on your phone.
How To: Use Google Lens to Translate Text from Books
News: All the Cool Kids Are Going to Instagram, Hanging Snapchat Out to Dry Snapchat 101: How to Share Custom Lenses & Filters with Friends That Won't Disappear News: Snapchat & Facebook Messenger Deliver Augmented Reality Camera Effects for Mother's Day
How to Improve the Look & Feel of Popular Apps Like Instagram
Here's everything you need to know. What is RCS messaging? Here's all you need to know about the successor to SMS. a protocol based on RCS Universal Profile that will supersede SMS.
Record stealthily, in the dark. This hack is simple and will turn any LED flashlight into an infrared night vision light you can use with any video camera. Infrared light is invisible to the human eye, but it will illuminate any area you are shooting.
Infrared Detectors
AD
While a locked bootloader usually means no custom ROMs, Safestrap Recovery bypasses the locked bootloader and installs a custom recovery on your AT&T or Verizon Note 3.
How to Install a Custom Recovery & New ROM on Your Bootloader
Do you dread opening Gmail because you have hundreds (thousands?) of messages waiting for you in an overburdened inbox? The solution is to get your inbox to zero messages and start dealing with incoming emails on a day-by-day basis so it doesn't fill up again.
How I Went From 1,000 Emails to Inbox Zero (and Stayed There
The iPhone X will prompt you to register your face when you set the phone up for the first time, and then you'll start teaching yourself how to use it. The iPhone X's Face ID is only slower if
How to Get the Best One-Handed Swiping Keyboard for iPhone
Want to know everything about your new Motorola Droid X from Verizon Wireless? This three-part video review goes through all the features of the Droid X, showing you how to use everything on the Android smartphone. It's got a 4.3-inch touchscreen and HD video capability, something a mobile phone has
Android Guide: How to Use Android Effectively
This video shows you how to change you Mozilla Firefox page to look like Safari.-First go into your Mozilla Firefox page and go to Google.-Next type in Firefox themes and click the very first option that appears.
How to make Firefox look and feel like IE, Safari, or Opera
How To: Get Dark Mode on Instagram for Less Stress on Your Eyes When Browsing Pics & Videos How To : Enable the Hidden System UI Tuner Menu in Android Marshmallow How To : There's a Hidden Feature in Nougat That Gives Your Android Phone or Tablet a Desktop-Like Experience
How to Enable Dark Mode in Google Calculator « Gadget Hacks
0 comments:
Post a Comment